Introduction
Transitioning from Unity to Unreal Engine, especially when working in C++, can be both exciting and challenging. This article is designed to guide Unity developers through the key differences and adjustments needed when adapting to Unreal Engine. Whether you’re moving to Unreal for its powerful graphics capabilities, C++ control, or project demands, understanding the nuances between the two engines will make your transition smoother and more efficient.
Purpose and Goals
The main goal of this guide is to bridge the knowledge gap for Unity developers as they move to Unreal Engine. We’ll highlight the differences in programming languages, project structures, and specific features that can make Unreal Engine unique and, at times, more complex than Unity. By addressing these areas, we aim to provide a roadmap that reduces common frustrations and empowers you to leverage Unreal’s potential fully.
Why Understanding the Differences Matters
Unity and Unreal Engine are both industry-leading platforms, but their structures, workflows, and performance optimizations vary significantly. While Unity’s C# is user-friendly and often more approachable, Unreal’s C++ offers a level of control and optimization that’s essential for high-end game development. By understanding these differences, developers can better adapt to Unreal’s systems, avoid common pitfalls, and build a solid foundation in C++—which is particularly valuable for those aiming to create optimized, complex game systems in Unreal.
With these objectives in mind, this article will walk you through the main adjustments you’ll face, best practices for working with Unreal’s C++, and practical insights from a voxel-based Minecraft-style project to illustrate these concepts in action.
Unity vs. Unreal Engine: Key Differences
As a developer moving from Unity to Unreal Engine, understanding the core differences between these two platforms is essential. While both engines are powerful, they each have unique characteristics that influence how you’ll structure projects, write code, and manage assets. In this section, we’ll cover the major contrasts, including the programming languages, project structures, and rendering capabilities.
1. Comparison of Programming Languages: C# vs. C++
One of the biggest shifts in transitioning from Unity to Unreal Engine is moving from C# to C++ or Blueprint but for this article we will look at C++. While C# is known for its simplicity and ease of use, C++ offers greater control and performance—though it often comes at the cost of increased complexity.
- C# in Unity: C# is a managed language, meaning memory management (e.g., garbage collection) is handled automatically. This makes it beginner-friendly and efficient for rapid prototyping, but can occasionally lead to performance limitations.
- C++ in Unreal Engine: C++ gives developers direct control over memory management and more detailed access to the hardware. However, it requires careful memory handling, as improper management can lead to bugs or crashes. Unreal also uses its own set of C++ macros and keywords (e.g.,
UCLASS,UPROPERTY) to handle engine-specific features, which takes some time to get used to.
Moving to Unreal Engine’s C++ often means adapting to lower-level programming practices. This may include managing memory manually, understanding pointers, and using Unreal-specific types, like TArray instead of List.
2. Differences in Project Structure and File Organization
Unity and Unreal Engine organize projects differently, each with a unique file structure that impacts how assets, scripts, and other resources are stored and accessed.
Unity Project Structure: Unity projects typically organize assets within the “Assets” folder. Scripts, prefabs, textures, and materials are all grouped under this single folder, making it straightforward but potentially cluttered for larger projects. Unity doesn’t require separate header files, which simplifies code structure.
Unreal Project Structure: Unreal Engine organizes projects with a more complex hierarchy. The “Content” folder stores assets, but C++ classes are located separately in the “Source” folder. Each C++ class has both a
.cppfile (implementation) and a.hfile (header), which requires more initial setup but provides better organization and separation of code responsibilities. The use of header files is central to C++ in Unreal, which can feel unfamiliar to Unity developers used to Unity’s C# structure.
Here is a comparison between the unreal engine interface and unity interface where I marked similar features of the engine.


3. Rendering Capabilities and Editor Integration
Both Unity and Unreal Engine offer advanced rendering capabilities, but Unreal is particularly known for its high-quality graphics out of the box.
Unity Rendering: Unity uses the Universal Render Pipeline (URP) and High-Definition Render Pipeline (HDRP) for customizable graphics. Unity’s rendering system is flexible, allowing developers to modify pipelines to suit specific project needs. However, achieving photorealistic graphics often requires more setup in Unity.
Unreal Rendering: Unreal Engine is well-regarded for its powerful rendering capabilities, especially with its physically-based rendering (PBR) and built-in lighting systems. Features like Lumen for dynamic lighting and Nanite for high-poly model rendering allow for impressive visuals without additional plugins. The engine’s editor is also highly integrated with these rendering tools, enabling real-time visual feedback and making it easier to achieve high-end, realistic visuals.
Unreal’s rendering engine is more tightly integrated with its Editor, enabling developers to visualize advanced effects like reflections, shadows, and complex lighting in real time. This makes it easier for artists and developers to iterate on visuals directly within the Editor, making Unreal Engine a popular choice for projects prioritizing visual fidelity.
In summary, understanding these core differences will set you up for success as you transition from Unity to Unreal Engine, allowing you to make the most of Unreal’s capabilities while adapting to its unique workflows.
The Role of C++ in Unreal Engine
C++ is at the core of Unreal Engine, providing developers with extensive control over the engine’s low-level operations. With great power, however, comes a steeper learning curve, especially for developers accustomed to Unity’s C#. In this section, we’ll explore how C++ is applied within Unreal, focusing on memory management, dynamic arrays, header files, and tips for managing the linkage between C++ and Blueprints.
1. Memory Management and Smart Pointers in C++
Unlike C#, C++ in Unreal Engine requires developers to manage memory directly. Unreal uses smart pointers—such as TSharedPtr, TWeakPtr, and TUniquePtr—to handle memory more efficiently and avoid issues like memory leaks.
- Smart Pointers: Smart pointers automatically release memory when no longer in use, reducing the risk of memory leaks.
TSharedPtris ideal for resources shared across multiple classes, whileTUniquePtris for exclusive ownership. - Garbage Collection: While Blueprints use Unreal’s garbage collection system, C++ memory management requires deliberate handling. Understanding smart pointers and when to use them is key to maintaining performance and avoiding memory errors.
Mastering memory management helps prevent common pitfalls, such as crashes from dangling pointers or fragmented memory.
2. TArray vs. List and Handling Dynamic Arrays
Unity developers often rely on the List type for dynamic arrays, whereas Unreal Engine uses TArray, a highly optimized array structure specific to Unreal.
- TArray Basics:
TArrayis a dynamic array type that can be resized at runtime and offers various utility functions likeAdd,Remove, andFind. It’s ideal for handling collections of objects in Unreal Engine. - Memory Management: Unlike Unity’s
List,TArrayin Unreal is designed to work seamlessly with the engine’s memory management system, enhancing performance and allowing for direct serialization and network replication.
Here’s a comparison example:
- Unity (C#):
List<int> numbers = new List<int>(); - Unreal (C++):
TArray<int32> Numbers;
Learning to use TArray effectively is essential for handling collections and arrays in Unreal Engine.
3. Header Files and the Unreal Reflection System
C++ in Unreal requires separate header files (.h) for declarations and implementation files (.cpp) for code definitions. Header files serve a crucial role in Unreal’s reflection system, which enables runtime type information for Blueprints and the Editor.
- Header Files: Declaring class structures, variables, and functions in header files allows Unreal to compile more efficiently. It also makes code easier to organize, especially in large projects.
- Reflection System: Unreal’s reflection system uses macros like
UCLASS,UPROPERTY, andUFUNCTIONin header files to expose C++ code to Blueprints and the Editor. This system enables designers to work with C++ classes in Blueprints, making them more accessible to non-programmers.
Example of a header declaration with Unreal macros:
UCLASS()
class MYPROJECT_API AMyActor : public AActor
{
    GENERATED_BODY()

public:
    UPROPERTY(EditAnywhere, BlueprintReadWrite, Category = "Properties")
    int32 Health;
};
Coordinate System and Axis Differences
A significant difference between Unity and Unreal Engine is their coordinate systems: Unity uses the Y-axis as the vertical axis, while Unreal Engine uses the Z-axis. This distinction can lead to unexpected issues for developers transitioning from Unity to Unreal, especially when handling transformations, movement, and positioning. In this section, we’ll explore the impact of these differences and provide tips for adapting to Unreal’s axis conventions.

1. Understanding and Adapting to Axis Differences
In Unity:
- The Y-axis represents the vertical direction (up and down).
- The Z-axis is the forward and backward direction.
In Unreal:
- The Z-axis represents the vertical direction.
- The Y-axis is typically the depth (forward and backward) direction.
This difference can be confusing at first, especially when converting 3D assets, scripts, or coordinate-based calculations. Adjusting to Unreal’s coordinate system requires rethinking positional references and understanding how Unreal interprets world space.
2. Practical Implications for Transformations, Movement, and Positioning
Transformations
When applying transformations in Unreal, it’s essential to account for the Z-axis being “up” rather than the Y-axis. This is particularly relevant when working with rotation matrices or converting Unity scripts to Unreal.
For example:
- Unity (C#):
transform.position = new Vector3(0, 1, 0); // Y-axis is up - Unreal (C++):
SetActorLocation(FVector(0, 0, 1)); // Z-axis is up
Unreal’s coordinate system may also affect the way you apply rotations and other transformations, requiring developers to think in Unreal’s “up” direction (Z-axis).
Movement and Navigation
If your project relies on movement along specific axes, the difference can impact navigation. For instance, when creating directional movement or translating player input, ensure that Unreal’s axis alignment is factored into calculations. In Unreal, moving “up” requires setting movement along the Z-axis, not the Y-axis.
- Example in Unity:
transform.Translate(Vector3.up * speed * Time.deltaTime); - Example in Unreal:
AddMovementInput(FVector(0, 0, 1), Speed); // Move along Z-axis
Positioning Assets and World-Building
Placing objects and adjusting them in the Unreal Editor may also take some practice, as world positions and imported assets might appear rotated or misaligned due to the axis difference. When importing assets from a Unity-based workflow, remember to adjust orientations to align with Unreal’s Z-axis-up convention.
Best Practices for Adapting to Axis Differences
- Double-check imports: Ensure that imported assets align correctly in Unreal by adjusting rotations if needed.
- Adjust player movement scripts: Adapt movement and camera code to reflect Unreal’s Z-axis as the up direction.
- Create utility functions: If you’re porting a large codebase, consider writing utility functions to convert between Unity-style and Unreal-style vectors for easier adaptation.
- Use Unreal’s built-in functions: Unreal provides robust tools for transforming vectors and rotations within its coordinate system, so leveraging these can reduce errors in axis handling.
Mastering these coordinate differences is key to a smooth transition, minimizing errors, and ensuring accurate object positioning and movement within Unreal’s environment.
Case Study: Building a Voxel World in Unreal
In this case study, we explore the development of a voxel-based world generator in Unreal Engine, designed to mimic the block-based aesthetic of games like Minecraft. This project leverages Unreal’s C++ API for procedural generation and performance optimization, allowing for the creation of expansive, dynamic environments. Below, we dive into the core features, techniques, and optimizations used to develop an efficient voxel world generator.
1. Overview of the Voxel World Generator Project
The primary objective of the voxel world generator is to create a vast, block-based environment where terrain is procedurally generated and updated as the player moves. Key goals for the project include:
- Efficient Chunk Management: Ensuring smooth gameplay by loading and unloading terrain data in chunks.
- Procedural Terrain Generation: Creating diverse and natural landscapes using Perlin noise.
- Mesh Optimization: Implementing techniques like hollow meshes to reduce the polygon count, which is essential for performance in large worlds.
To accomplish this, the world is divided into “chunks,” each representing a section of blocks (voxels). Only nearby chunks are loaded and rendered, allowing for a high level of detail without overloading memory or GPU resources.

2. Chunk and Block Handling within the Voxel System
The voxel world is divided into chunks to streamline loading and unloading as the player moves. This setup ensures only necessary chunks are active, keeping resource usage optimized. Here are some core features:
- Defining Chunks and Blocks: Each chunk is a grid of blocks (voxels), with data like block type and visibility. This structure allows for efficient manipulation and rendering of individual blocks.
- Active Chunk Management: Chunks close to the player are generated and rendered, while distant chunks are unloaded. This keeps memory usage low and allows for smooth transitions as the player explores.

3. Creating Hollow Chunks
One significant optimization is the creation of hollow chunks, where only the visible outer faces of blocks are rendered. This approach greatly reduces the number of polygons needed for each chunk, especially in large worlds. By omitting hidden blocks, we decrease both the rendering load and memory usage, which is vital for performance.

4. Ore Veins, Trees, and Structures
The world generator supports additional features such as ore veins, trees, and other structures to enhance the environment. Key elements include:
- Ore Spawning: Certain blocks within the terrain are designated as ore, appearing in clusters to resemble veins.
- Tree Generation: Using procedural rules, trees are spawned at random locations, adding visual variety and interaction points within the landscape.
- Custom Structures: The generator also supports structures like huts or caves, which are placed based on specific parameters to add depth to the world.
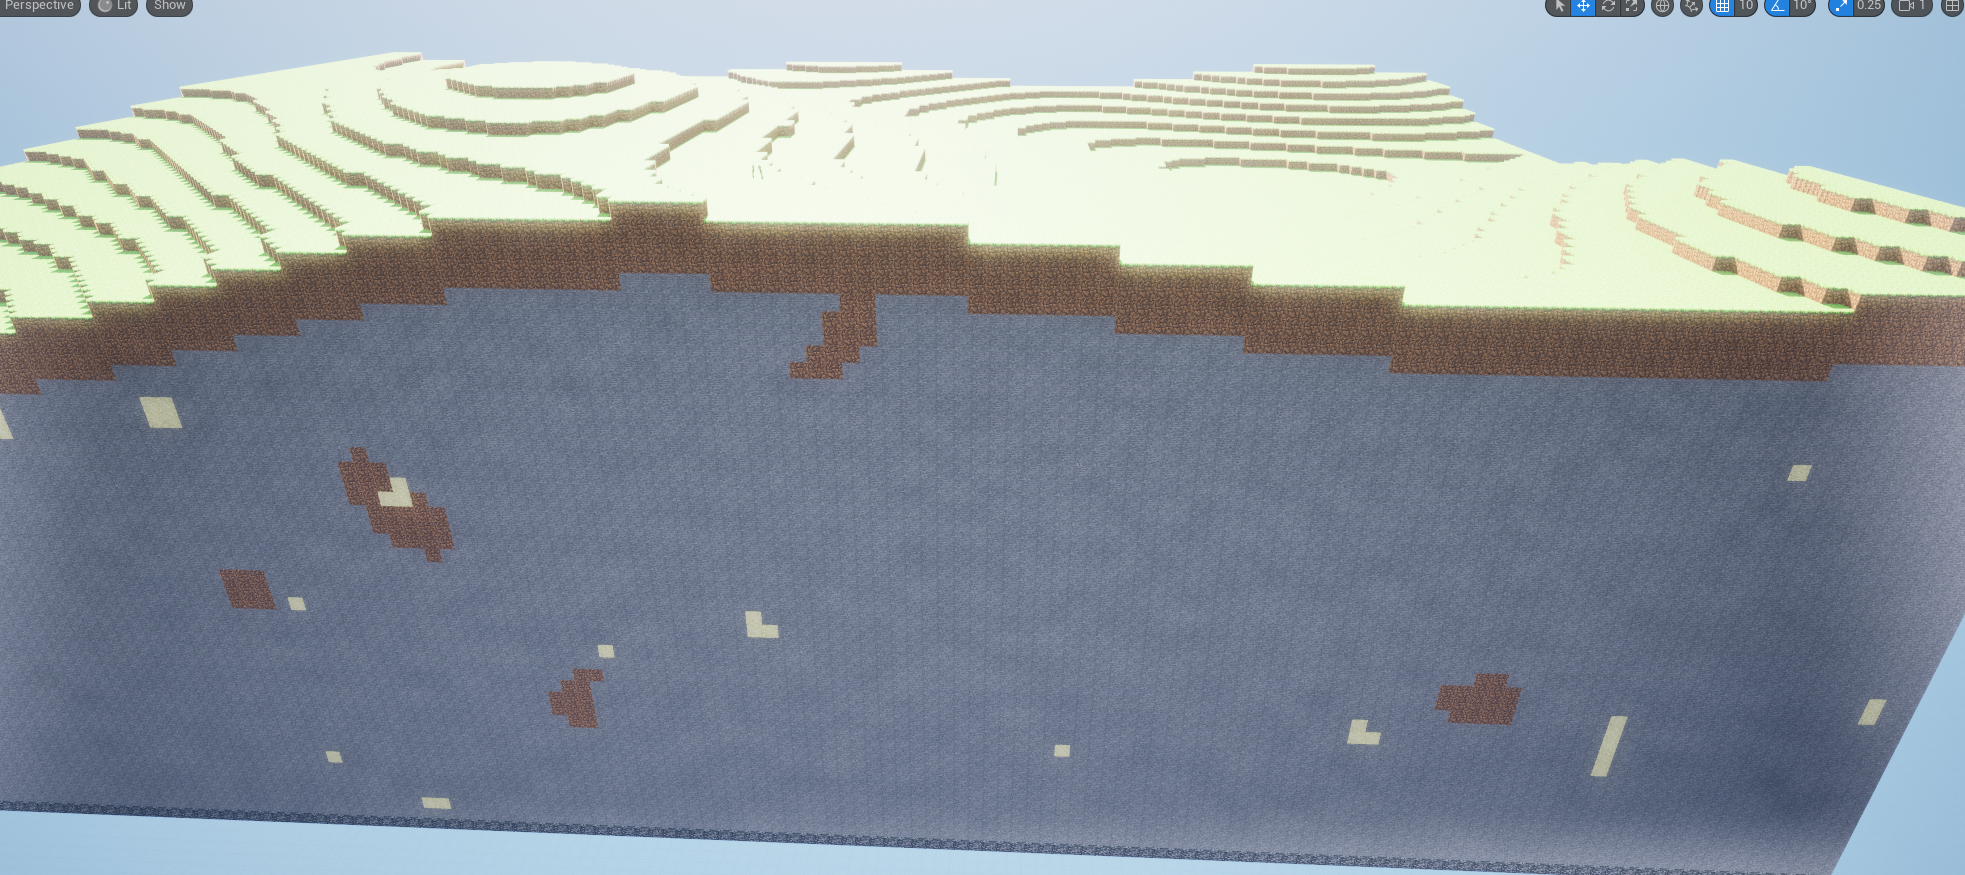
5. Terrain with Height Variations
The generator incorporates height variations using Perlin noise to create realistic hills and valleys, providing a more natural feel to the landscape. These variations allow for diverse biomes, from flat plains to towering mountains, enhancing both visual appeal and exploration.
- Noise Maps for Elevation: Height differences are calculated using noise functions, which create smooth, randomized changes in elevation across the terrain.

6. Block Interaction: Breaking and Placing
To encourage interactivity, the voxel world allows players to break and place blocks, similar to Minecraft. This feature adds a sandbox element, where players can modify the world to create structures or pathways.
- Block Placement/Destruction: Players can interact with blocks using simple input controls. Destroyed blocks are removed from the chunk, while placed blocks are added to the chunk data and rendered dynamically.

7. Seed System for Consistent World Generation
The generator uses a seed system, ensuring that the same seed value will always generate the same world. This consistency allows players to share world seeds, creating identical landscapes for others to explore.
- Noise-Based Terrain Generation: By feeding a consistent seed into the noise function, we ensure that terrain, structures, and features are generated in the same arrangement every time.
In summary, the voxel world generator leverages Unreal Engine’s C++ capabilities to handle complex, procedurally generated environments. With optimizations like hollow chunks, dynamic loading, and a noise-based terrain system, the project achieves efficient performance even in expansive worlds. The generator serves as an example of how C++ can be applied effectively in Unreal to create interactive and large-scale environments.
Best Practices for C++ in Unreal Engine
Working effectively with C++ in Unreal Engine involves following established practices to ensure code is clear, maintainable, and optimized for performance. Adhering to Unreal’s conventions and using its unique data structures can streamline development and make the codebase easier to work with for anyone familiar with Unreal.
1. Following Unreal’s Code Conventions for Clarity and Consistency
Unreal Engine’s C++ conventions cover everything from naming standards to file organization, designed to ensure that code is both readable and standardized across projects. Following these conventions is crucial for:
- Readability: Consistent naming (such as
CamelCasefor class names andPascalCasefor function names) makes it easy for others to understand your code. - Compatibility with Unreal’s Tools: Unreal’s reflection system, which powers features like Blueprint access and serialization, depends on precise naming and structural conventions.
Some core conventions include:
- Prefix Class Names with ‘A’ for Actors and ‘U’ for Non-Actors: For example,
APlayerCharacterfor an actor class andUHealthComponentfor a utility class. - Use of PascalCase for Function Names and Variables: Functions and variables are typically named with capitalized words to distinguish them from Unreal’s macros, which are usually in all caps.
Example:
class AMyCharacter : public ACharacter {
public:
    void StartSprint();  // Function in PascalCase
    int32 Health;        // Variable in PascalCase
};
Conclusion
In this article, we explored the significant differences between Unity and Unreal Engine, particularly focusing on the use of C++ in Unreal Engine. We discussed several key areas that are crucial for developers transitioning from Unity to Unreal, including:
- Key Differences: We compared programming languages (C# vs. C++), project structure, and rendering capabilities, emphasizing the unique features that Unreal Engine offers.
- The Role of C++: We highlighted the importance of C++ in Unreal, including memory management techniques, the use of
TArrayinstead of standard lists, and the need for header files in the development process. - Coordinate System Differences: Understanding the axis differences between Unity and Unreal is essential for correct positioning and movement within the game world.
- Case Study: Through the example of building a voxel world generator in Unreal Engine, we illustrated practical applications of C++ in handling chunks, generating terrain, and optimizing meshes.
- Best Practices: We provided best practices for coding in Unreal, focusing on adhering to Unreal’s conventions, leveraging built-in data types, and effectively integrating Blueprint and C++.
Embracing Unreal’s Capabilities
For Unity developers, embracing the capabilities of Unreal Engine can open new avenues for creativity and performance. The powerful rendering engine, robust toolset, and flexibility of C++ allow for the development of complex systems and rich environments that can enhance the gaming experience.
As you embark on your journey to learn Unreal Engine, remember that many principles from Unity will apply, even if the implementation differs. Take time to familiarize yourself with Unreal’s features and adapt your workflow to harness its strengths fully.
Final Thoughts and Next Steps
Transitioning from Unity to Unreal Engine may seem daunting at first, but with patience and practice, you can leverage your existing knowledge to navigate this new environment successfully. Start by experimenting with small projects in Unreal to gain confidence with its C++ framework and tools.
Consider utilizing resources such as Unreal Engine’s documentation, online tutorials, and community forums to support your learning. Engaging with the community can provide valuable insights and assistance as you tackle challenges along the way.
In conclusion, the transition to Unreal Engine presents an exciting opportunity for growth as a game developer. By understanding the differences, embracing best practices, and leveraging the power of C++, you can create impressive games and experiences that captivate players.
bron
https://www.aclockworkberry.com/basis-orientations-in-3ds-max-unity-3d-and-unreal-engine/