Northern light shader
Abstract
This article presents a research and development of a visually stunning northern light shader. It analyzes the northern light and gathers information about this stunning phenomenon. The research takes a deep dive into the best ways to make the northern light shader as visually stunning as possible, involving different techniques for achieving realism. The solution for the best techniques are hlsl and raymarching. Hlsl provides a great amount of functionality and performances. And according to this research, raymarching is the most realistic technique. The development part then started with the results of this research. The document has small pieces of code and a bunch of iterations of the northern light shader. It ends with the implemented visually stunning northern light shader.
Table of Contents
- Northern light shader
- Abstract
- Process of making the shader
- Making the northern light
- Results
- conclusion
- Reflection
- Future work
- Sources
Introduction
The sky is one of the most fundamental yet impactful elements in game environments. To create a visually appealing sky in a game you probably want to add a shader. In my case, I want to create a northern light shader. I’ve always liked the northern light, it just looks so awesome, they are nature’s most breathtaking phenomena. I want to learn how to create one in Unity. I’ve always wondered how game developers made visually stunning things like this. And in this semester, I want to find out, and make an aurora myself.
Research question
Main question:
• How can a visually stunning northern lights shader be created in Unity?
Sub questions:
• What are the different shader techniques to create shader in Unity?
• What is the best technique for creating a northern lights shader?
• What techniques can enhance the realism of the shader?
• How can you optimize shaders to maintain high quality while ensuring good performance?
Problem
Unity’s default skybox has a simple blue sky, and doesn’t necessarily look good in a game. To make a ‘good’ looking game, you will need a custom sky/skybox. And the sky I want to create is a northern light shader. But creating a custom northern lights shader has multiple difficulties, like:
• Simulating organic, dynamic motion.
• Balancing color gradients, transparency, and emissive glow.
• Maintaining performance.
To address these issues, I will explore techniques that can solve all of these difficulties to create a northern light that is both visually stunning and efficient.
Goal
My goal for this project is a successful end product that is a world with:
• An animated northern light effect, that looks like the real world northern light.
• Include bright stars and a fitting environment.
• Optimize shaders/lighting for quality and performance.
To gather some inspiration, I searched over the internet to find some good examples of northern light shaders, and these were my favorites: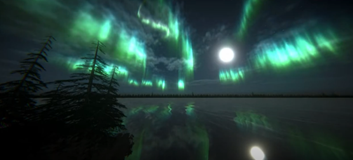
I want to make my northern light shader to look somewhat like these, while keeping good performance and high quality. They will be useful to look at, so I will have a good visual representation of what the northern light should look like. And also to see what techniques they used, and how they made the shader.
What the northern light looks like
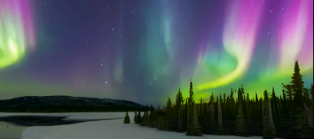
The northern lights, also known as the aurora borealis, are dynamic, glowing ribbons of light that have fascinated humans for thousands of years. Despite their beauty, this breathtaking display results from a highly energetic and turbulent process. The aurora forms when charged particles from the sun collide with Earth’s upper atmosphere at incredible speeds [16]. The best places to spot the aurora are at northern countries such as norway, sweden, finland, iceland and greenland [17]. They can also appear in different colors like green, blue, purple, yellow and red. The movement of the aurora is also very notable, it looks like it is dancing in the air with a wavy pattern.
These are some pictures of the northern light: 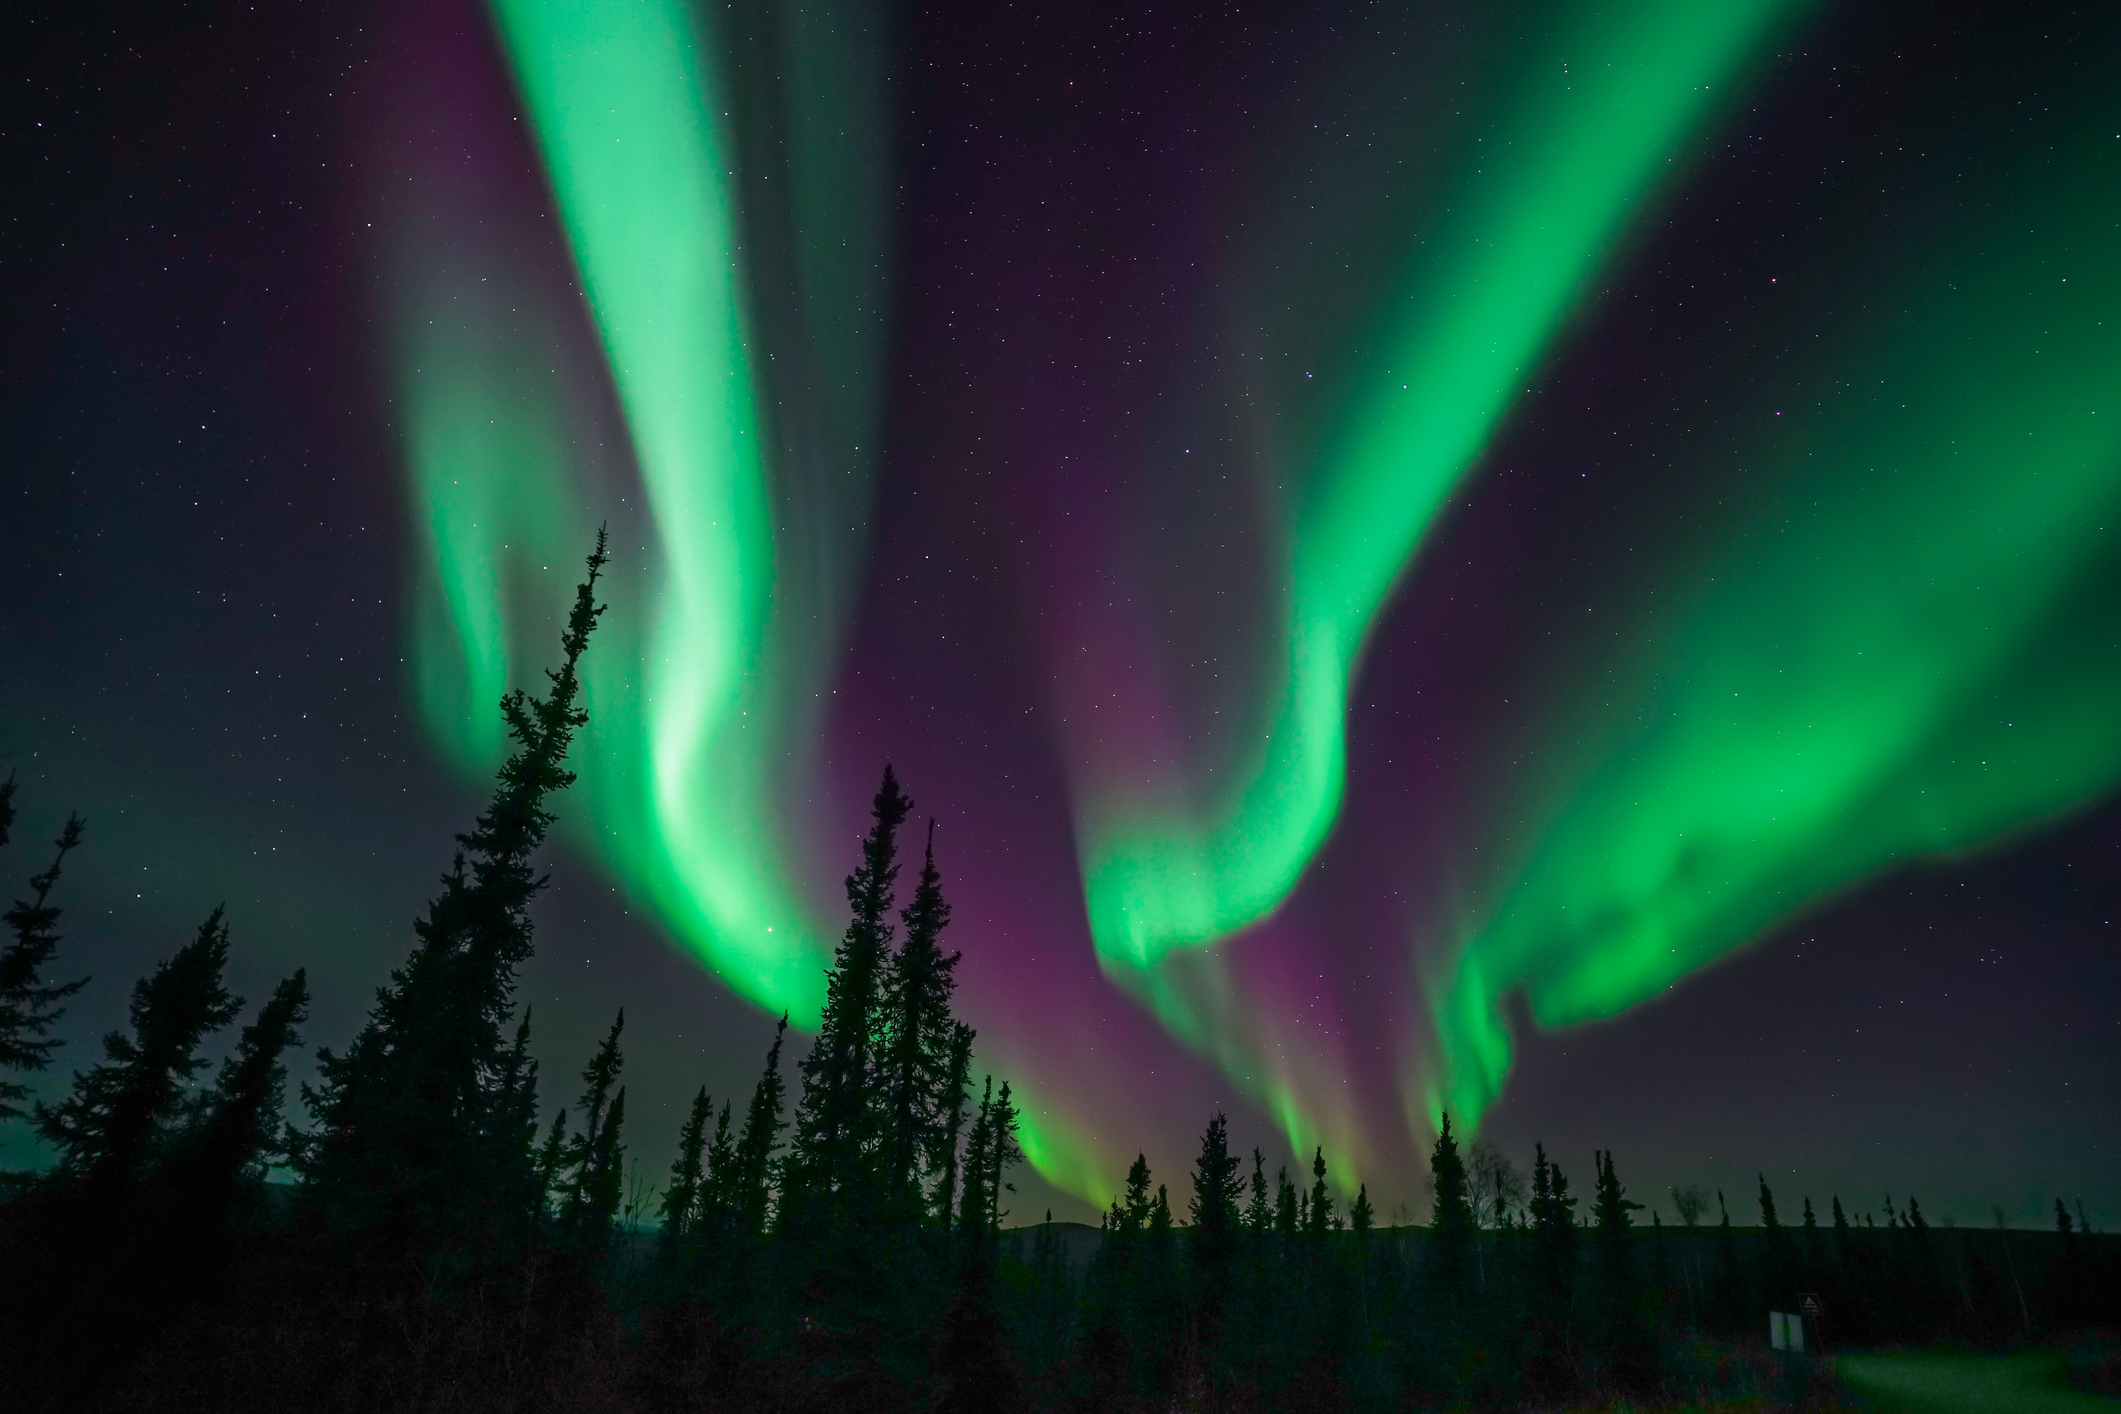
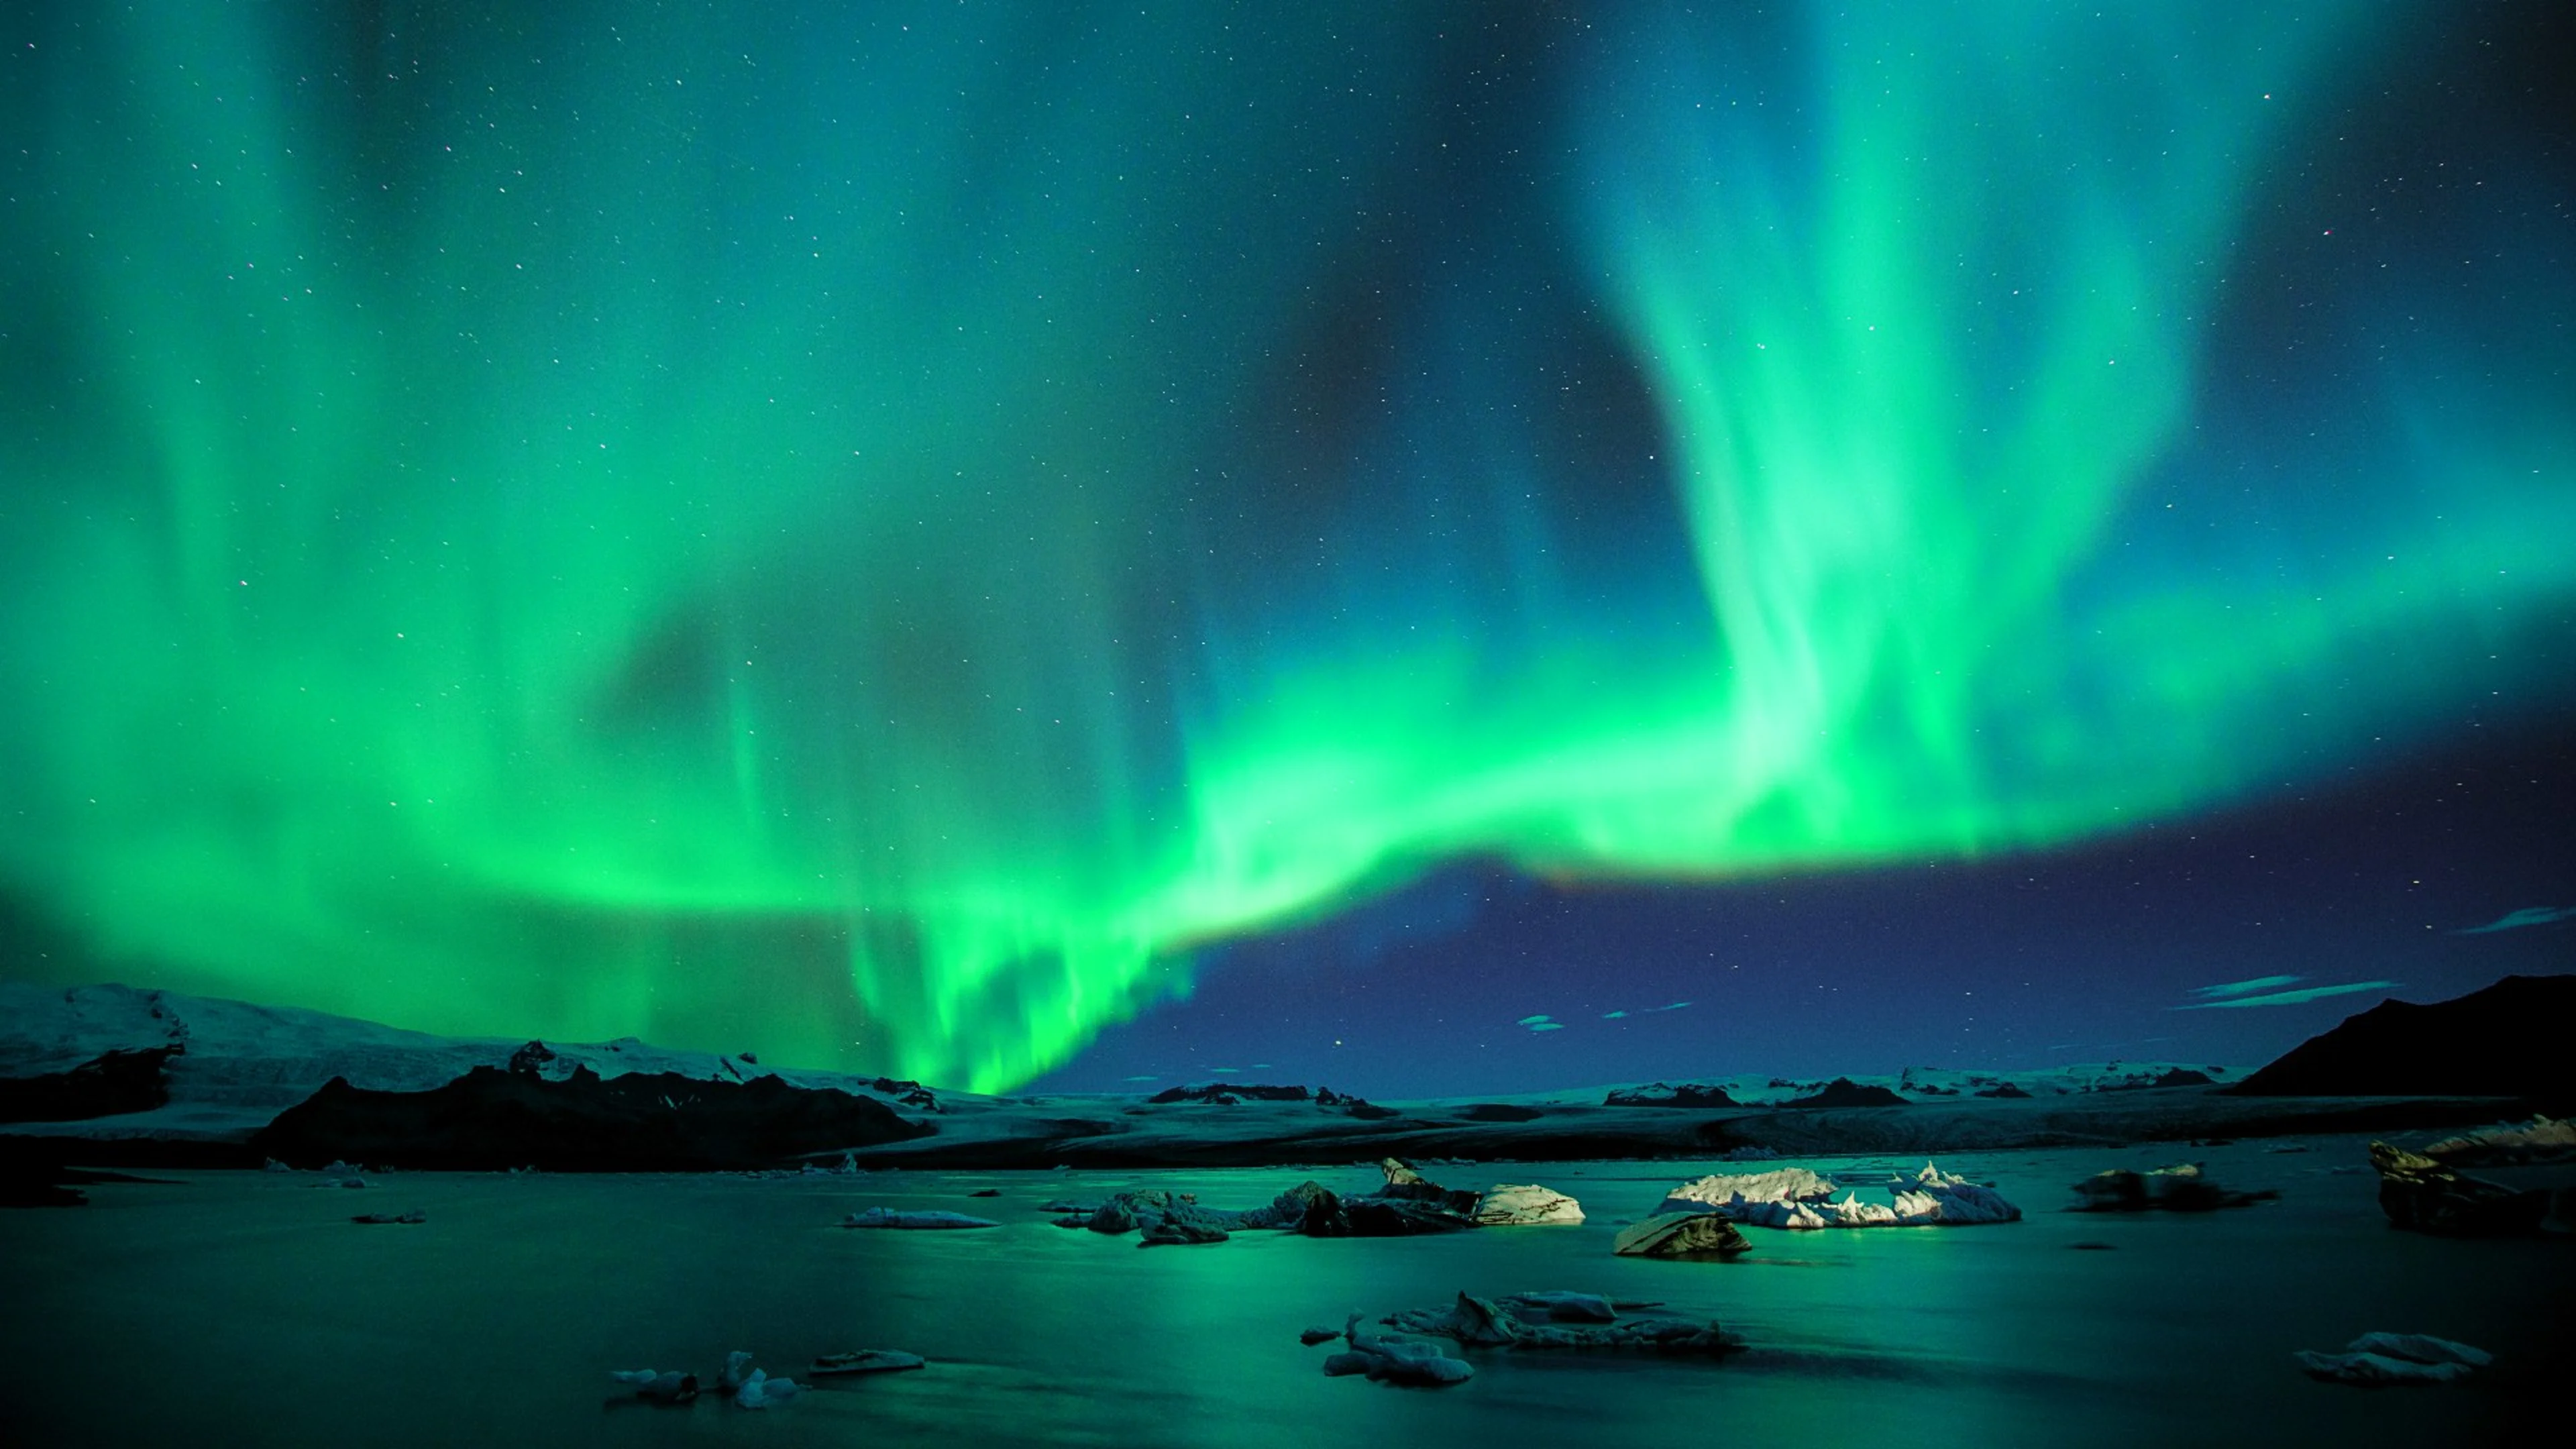
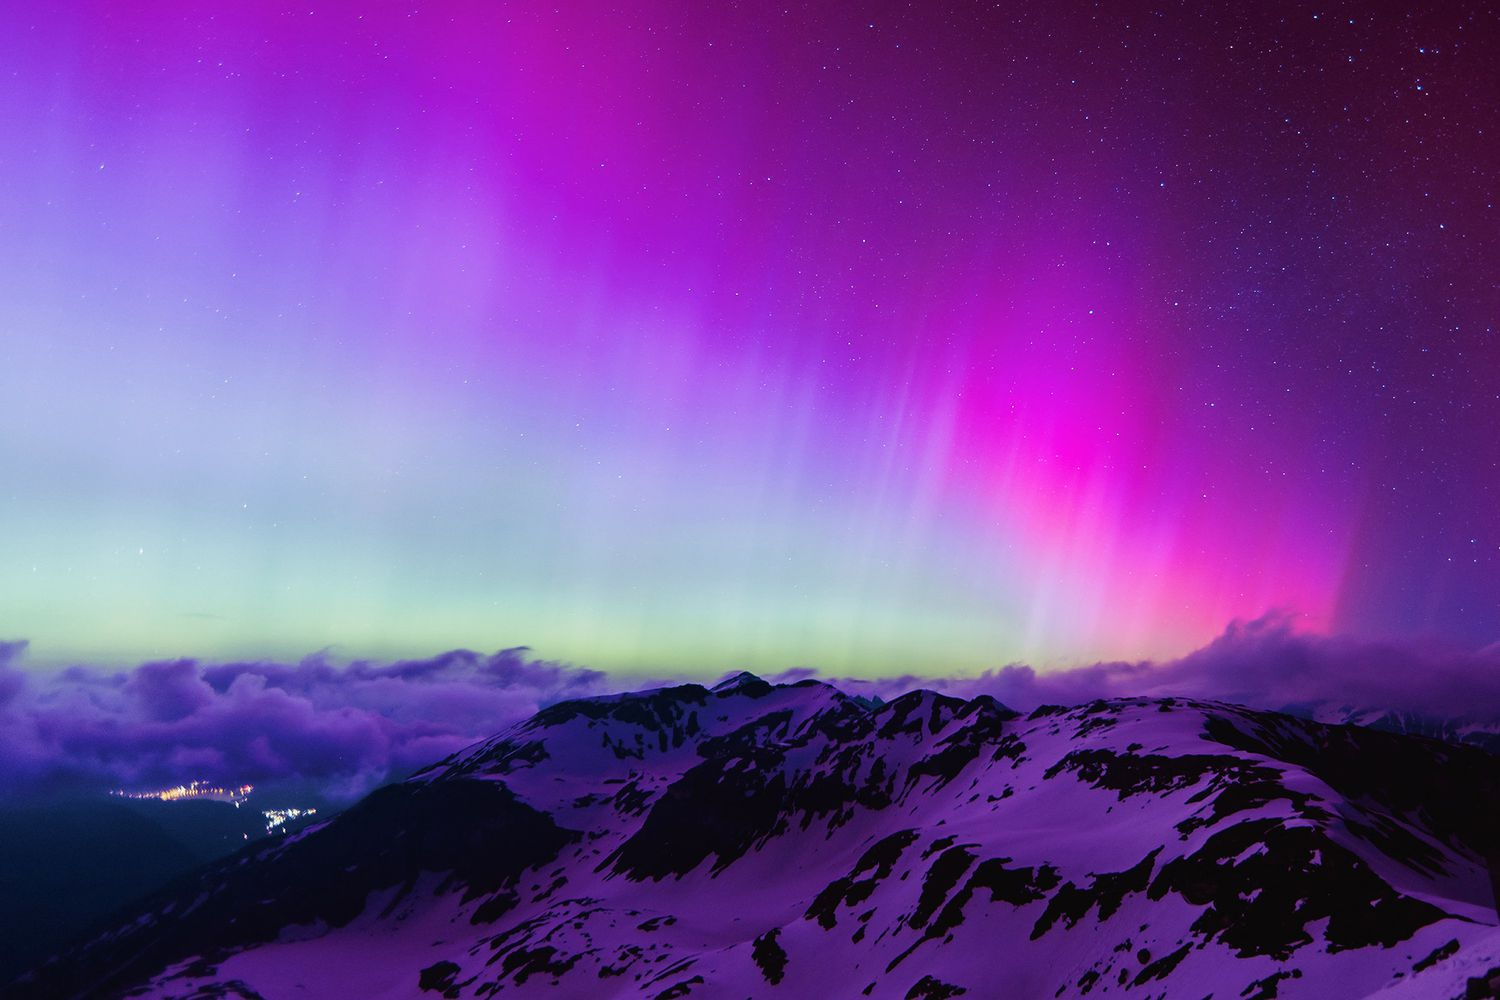
When making the shader, I need to keep a few things in mind that are important when you look at these real life auroras:
• The dynamic motion of waves.
• Different colors, and gradients.
• Transparency.
Unity shader techniques
There are multiple different techniques to make a shader in Unity. You can use shader graph to create shader object without writing code. Or use a programming language called HLSL to write shaders in code. And there is also a unity framework that is called shaderlab which you can use with Cg/HLSL [7]. Shaderlab allows you to change textures and colors in the unity inspector for example. But which technique is the most optimal to use in this project?
To get a good comparison, here are some pros and cons for shadergraph and HLSL:
Shader graph pros:
• Easier to learn
• Good for quick prototyping
• Easy debugging
Shader graph cons:
• Worse performance
• Lack of functionality
HLSL pros:
• More functionality
• Gives a better unstanding about shader
• More control
• Better optimizations
• Cross-platform
HLSL cons:
• Steep learning curve
• Difficult debugging
[5] [6]
So basically, if you want to make prototypes or have an easier learning curve, use shader graph. And if you want have better performance and functionality, use HLSL.
This part of the research has changed my plans, and I will not be making the shader in shader graph anymore. But I want to start with shader graph to make a nice prototype of what I want to achieve. And after that I will make the northern light shader with HLSL and add the shaderlab framework to it.
Skyboxes
Skyboxes are commonly used in video game design to create the illusion of a larger, more immersive game world, without the need for additional geometry and textures [1]. They can be very important to set the feel and look of the game.
Prototype using shader graph
You can only see the stars and northern light in the night. And so I started with making the night darkness. This has to be a color mix of blue and black, and it should also have a transition between the ground and the sky.
This is what the default skybox looks like: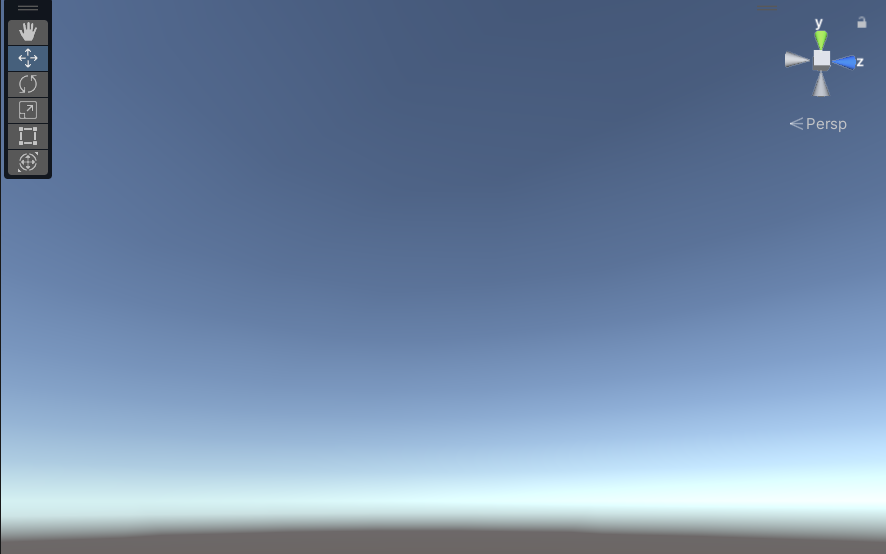
I used an awesome youtube tutorial from Digvijaysinh Gohil for this [3].
This is the result: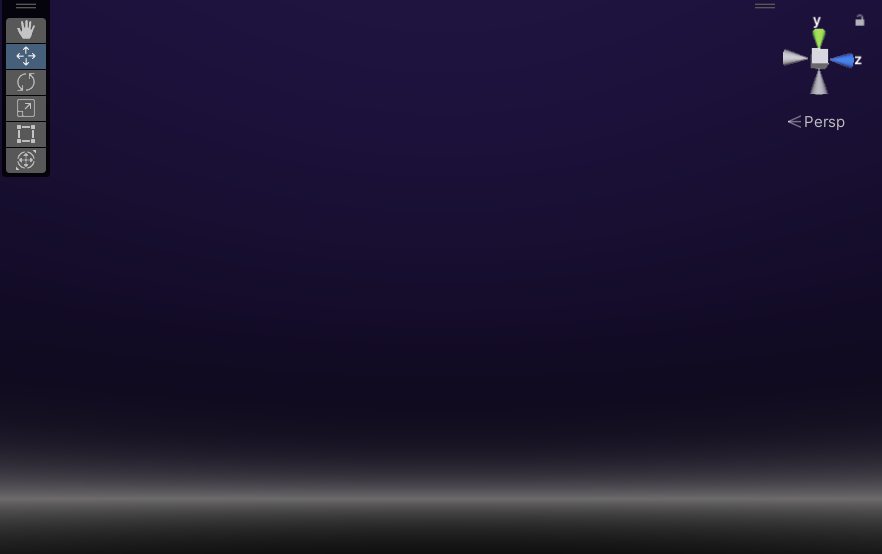
Then it was time to make the stars.
They look like this: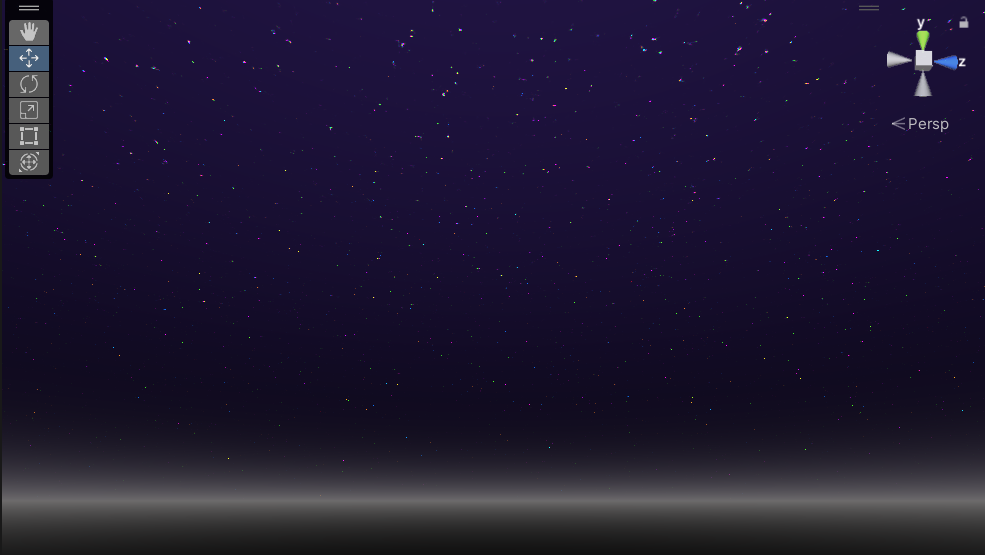
After that, the northern light got made, and here is a gif of the northern light prototype: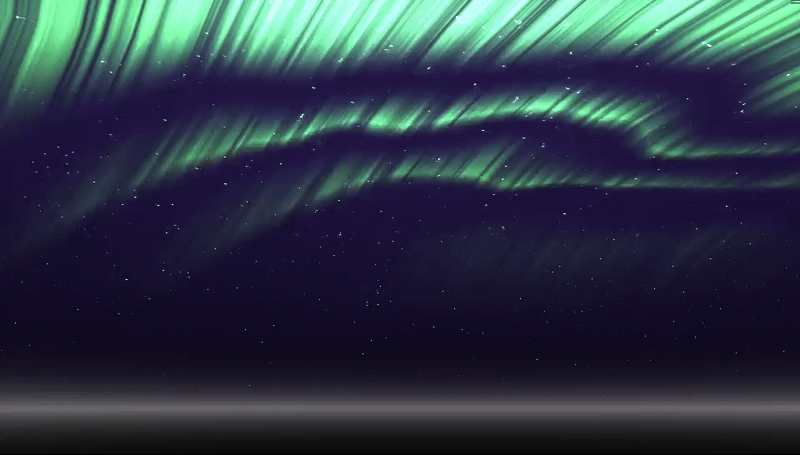
This northern light looks fine, but very cheap. And the longer you look at this, the worse it gets. The problem with this prototype is that the aurora is very flat. It has no vertical depth, which makes it boring to look at. And it also doesn’t add any color variations or gradients. But the transparecy effect does look pretty good, and the techniques used for this, which is by using noise, could be used again.
Process of making the shader
Making the night darkness
Now that the prototype has been made, it’s time to start with making the actual shader. I started with making the shader script and the skybox material. 
I then set the skybox to the skybox material. You can do this by going to window > rendering > lighting > enviroment and then changing the skybox material to the material I wanted to use. You can then drag the shader script ontop of the material to make the material respond to the code that was written inside of the shader script.
In the code, I started with adding a RGBA color component into the unity inspector.
 Properties
 {
 _Color ("Color", Color) = (1, 1, 1, 1)
 }
You can easily change the color here: 
The frag function is responsible for computing the final color of each pixel.
fixed4 _Color;
fixed4 frag(v2f IN) : SV_Target
    {
        fixed4 pixelColor = tex2D(_MainTex, IN.uv);
        return pixelColor * _Color;
    }
And the skybox will look like this:
The sky obviously looks very simple with only one color. So it is time to add a gradient to the sky to make it seem more realistic.
To do this, add a top and bottom color in the properties like this:
_TopColor ("Top Color", Color) = (1, 1, 1, 1)
 _BottomColor ("Bottom Color", Color) = (1, 1, 1, 1)
Changed the frag function to calculate the gradient:
fixed4 frag(v2f IN) : SV_Target
{
    float gradient = saturate(IN.worldDir.y * 0.5 + 0.5);
    return lerp(_BottomColor, _TopColor, gradient);
}
• IN.worldDir.y * 0.5 + 0.5 shifts the Y-axis from [-1,1] to [0,1]. This makes the gradient transition smooth from bottom to top. • lerp(_BottomColor, _TopColor, gradient) blends colors based on the Y-value. When gradient is 0, the bottom color is used, when 1, the top color is used.
This is the result after adding the gradient: 
The next thing I decided to add is a horizon, since you cannot really tell the difference between up and down in the skybox. For now, I will make it a gradient that will blend in with the sky.
Add a color property:
_HorizonColor("Horizon Color", Color) = (1, 1, 1, 1)
Adding this code inside of the frag function:
float horizonFactor = smoothstep(0.00, 0.03, abs(IN.worldDir.y));
fixed4 horizonBlend = lerp(_HorizonColor, _BottomColor, horizonFactor);
return lerp(horizonBlend, _TopColor, gradient);
The horizonFactor creates a smooth blending effect. The horizonBlend mixes _HorizonColor and _BottomColor based on the horizonFactor. And then horizonBlend and _TopColor will get mixed by the gradient to create smooth blend between the sky and hte horizon.
It will look like this:
I then simulated the northern light with the use of colors, which looks like this: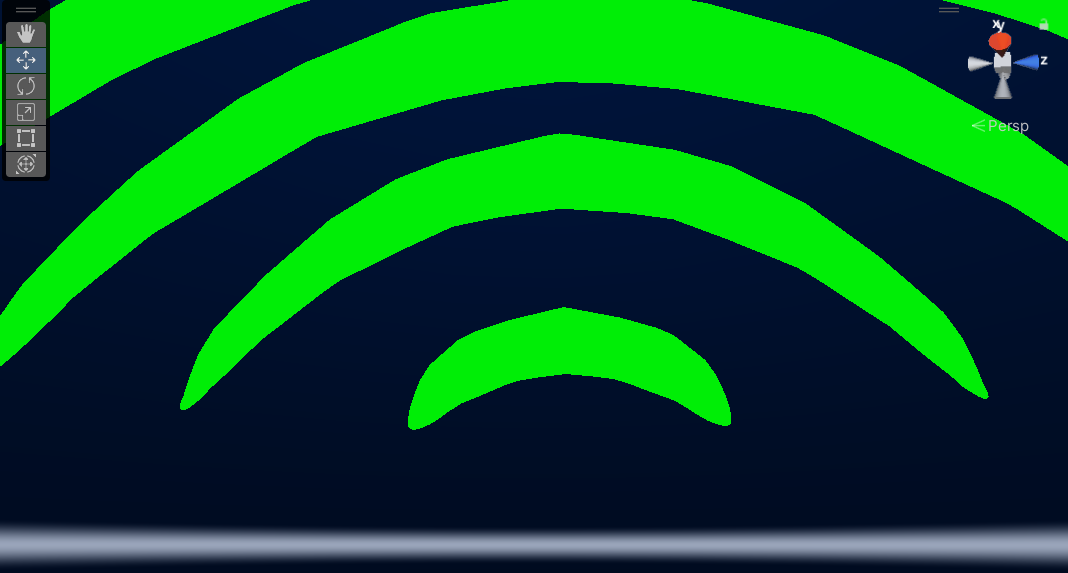
This method using colors doesn’t seem so good to use after all, so its time to find a new technique to create a northern light shader.
Techniques for Creating a Northern Lights Shader
The Northern Lights, also known as Aurora Borealis are a complex natural phenomenon that requires advanced rendering techniques to simulate realistically. There are multiple approaches to creating a northern light shader in computer graphics. This documentation explores five different methods, explaining how each works and when to use them.
Raymarching for volumetric rendering
Raymarching is a technique that allows for realistic 3D effects inside a shader. It works by sending rays through a volume and checking how much light is at each point. This is great for making auroras because it gives them depth and smooth movement.
How it works:
The shader sends rays into the sky and calculates how much light is in different areas. A noise function (like Perlin or Simplex noise) adds randomness to make the aurora look more natural. The colors are blended together using a falloff function to make the effect look soft and realistic.
Pros:
• Creates realistic depth (vertical aswell) and motion
• Looks great when animated
• Works well with lighting effects
Cons:
• Hard to set up compared to other methods
[8]
Procedural noise-based rendering
Procedural noise can be used to generate aurora patterns directly on a 2D surface. This method is fast but doesn’t have as much depth.
How it works:
A noise texture is used to create the wavy shapes of the aurora. Extra layers of turbulence (more noise) are added to make it look more dynamic. The texture is animated over time to make it seem like it moves.
Pros:
• Fast and efficient
• Easy to integrate into a skybox
• Good for stylized effects
Cons:
• Can look flat without extra tricks
• Harder to control lighting and blending
[9]
Flow mapping for animated textures
Flow mapping is a technique that makes textures move smoothly in a controlled direction, creating a fluid movement effect. It’s a common method in game engines for animated effects.
How it works:
A static aurora texture is created and stored in a texture file. A flow map tells the shader how to distort the texture over time. The texture loops seamlessly, making it look like the aurora is moving.
Pros: • Very efficient for real-time rendering
• Can create complex animations with little performance cost
• Works well with normal maps for extra detail
Cons:
• Less flexible than fully procedural methods
• Needs pre-made textures
[10]
Particle systems with alpha blending
A particle system can be used to simulate the movement of the aurora. Each particle represents a small piece of the aurora, and they blend together to create the full effect.
How it works: Particles are spawned in the sky, following a movement pattern. Each particle has a soft gradient texture to make smooth blending. The colors change over time, making the auroras colors realistically.
Pros:
• Can be used with other effects like bloom and fog
• More flexible than pre-made textures
Cons:
• Needs lots of particles for smooth blending
• Is very performance-heavy
Chosen Technique
After evaluating methods the techniques, I’m going to use is Raymarching. The main reason for that is because it can be really realistic, even if it moves, which is really nice for the northern light. And after analyzing an existing northern light shader, it also used raymarching, proofing that this technique can work [11]. The other techniques that were described could work aswell, but raymarching should in theorie be the best.
I will go more into depth on ray-marching, to see how it actually works, and how to implement this in unity. With raymarching we will shoot out a bunch of rays from the camera that is looking at the world. You would like to know how far you can march before hitting an object. But the ray only knows the distance to each object, but not where it’s location is. So to make sure the ray doesn’t hit any objects, it will make a circle that has a radius of the smallest distance.
The distances:
And after shooting the ray it will look like this: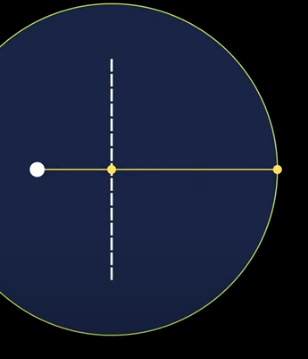
It will keep doing this same process over and over again until the ray runs into an object. And it will look like this in the end:
[12] [13]
How I want to use raymarching
Instead of using raymarching just to render hard-surfaced objects (like boxes or spheres), I adapted it to create soft, glowing, volumetric effects. They are essential for mimicking the northern lights appearance. Here’s how it works:
Density Accumulation: Instead of stopping at the first “hit,” the ray continues marching through the object. And for each step inside the object, it accumulates a “density” value based on how deep the ray is inside the object.
To make it easier to understand, look at this image: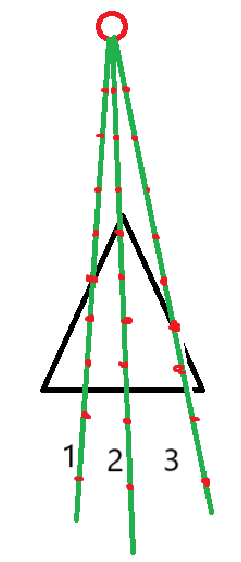
In this case, the red circle is the camera. It shoots out 3 rays, which are the 3 green lines. Every red dot is a step that the ray took. And the distance between each step is the step size. And the triangle is the object. Now when you look at line 1, there are 3 red dots inside of the object. While line 2 has 4 red dots inside of the object and line 3 only has 2. And the more steps it takes inside of the object, the less transparent it becomes, which means that the object will get more hard-surfaced.
So in conclusion, line 2 rays through the object more, which means it has a harder surface then the line 3, which will be more soft edges. This creates a smooth falloff at the edges instead of hard cuts. And this will be useful for the northern light effect, since this effect also has smooth edges instead of hard cuts.
Applying raymarching
I started of by watching the coding adventure clouds video by sebastian lague[15]. He explained really well how he had made clouds in unity with raymarching, noise and other techniques. This was really interesting to watch and gave me some good ideas on how to make the northern light shader. I tried his approach, but I couldn’t get it to work. I had the feeling I was missing some stuff that he didn’t explain, and his approach was also rather difficult.
It did gave me some good ideas, and I wanted to test these out since I didn’t want to be stuck for to long on the HLSL raymarching code. So I tried making the northern light effect using HLSL without raymarching, on a simple 2d quad. I added a noise onto the quad, and I figured that by compressing the texture, you would get some sort of vertical lines, which really look like the northern light if you ask me.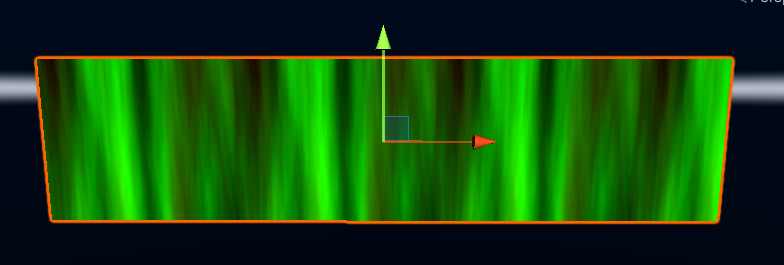
Then I tried to add a mask, to remove the hard edges on the quad, because you can clearly see the rectangle in the space, while it should ofcourse look natural. I didn’t propely get this to work, but I know it should be the best way to do this. I also wanted to add movement that represents the moving northern light. But I figured out that the quad doesn’t have enough vertices to make a smooth moving effect. But I should be able to make this work using raymarching.
I spend quite some time figuring out how to setup raymarching. Until I found a really useful tutorial by peerplay [14]. This tutorial helps you setup the camera for raymarching, and further videos in the playlist help you do basic stuff with raymarching aswell. After following these, I started to test things out.
Here is a explanation of my code and what I’ve done:
Box with an empty space with the use of a sphere: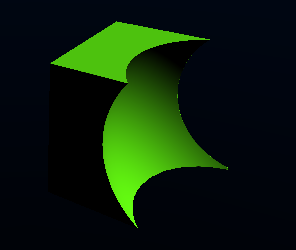
 float Box1 = sdBox(p - _box1.xyz, _box1.www);
 float Sphere1 = sdSphere(p - _sphere1.xyz, _sphere1.w);
 return opS(Sphere1, Box1);
And here is that same object, but many times:
float modX = pMod1(p.x, _modInterval.x);
And here is some more trippy looking raymarching object using the modinterval on the x,y and z, making a lot of the same object in the world space:
I had to set up the camera frustum and transform it into world space like this:
    // Get the ray direction from the camera frustum
    o.ray = _CamFrustum[(int)index].xyz;

    // Normalize the ray direction
    o.ray /= abs(o.ray.z);

    // Transform to world space
    o.ray = mul(_CamToWorld, o.ray);
Now we have a proper ray direction for each pixel.
Objects are defined using signed distance functions in the distanceField function:
float distanceField(float3 p)
{
    float modX = pMod1(p.x, _modInterval.x);

    float waveSpeed = 1.0;
    float waveAmplitude = 1.0;
    float waveFrequency = 0.2;

    // Wave movement for the box
    float movingZ = _box1.z + (_Time.y * waveSpeed) + sin(modX * waveFrequency + _Time.y) * waveAmplitude;
    float Box1 = sdBox(p - float3(_box1.x, _box1.y, movingZ), _box1.www);

    float Sphere1 = sdSphere(p - _sphere1.xyz, _sphere1.w);
    return opS(Sphere1, Box1);// Subtract the sphere from the box
}
And now you can cast rays into the scene and check if they hit something with this function:
fixed4 raymarching(float3 ro, float3 rd, float depth) {
    fixed4 result = fixed4(1,1,1,1);
    const int max_iteration = 164;
    float t = 0; // Distance traveled along the ray

    for (int i = 0; i < max_iteration; i++) {
        if (t > _maxDistance || t >= depth) {
            result = fixed4(rd, 0); // Background color
            break;
        }

        float3 p = ro + rd * t;
        float d = distanceField(p); // Get distance to closest object

        if (d < 0.01) { // If the ray hits an object
            result = fixed4(_mainColor.rgb, 1);
            break;
        }
        t += d; // Move the ray forward
    }
    return result;
}
Making the northern light
After learning, it was time to start the with northern light.
I was able to make a long row of boxes that go into eachother. And added a sinuous waving movement: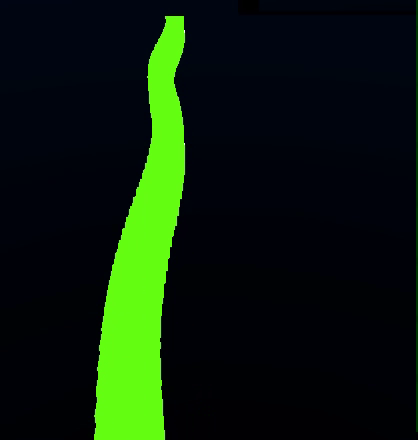
The movement look decent, but it has the same motion everytime, which isn’t something that happens in the nature with the northern light, so there has to be randomness to that later.
Now that setting up the raymarching is done, we can actually being with making the northern light.
I started by making the boxes spheres, since I thought that would look better. Then I added a noise onto these spheres. This gave them a random wobbly looking effect: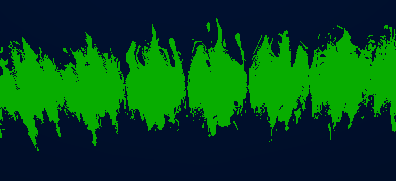
And with some compressing and stretching this noise, I was able to make this: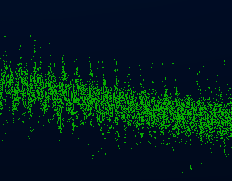
It somewhat looks like a low quality northern light, but that wasn’t what I was searching for. And when moving the camera around, it also started looking very glitchy. After doing this approach with a noise, I noticed that this wasn’t the correct way to make a visually stunning northern light. So I had to switch plans, and take a different approach.
Let’s properly use raymarching instead. We will march a ray step-by-step through the scene.
After using proper raymarching on the spheres, I was able to make a pretty good looking glowing effect. 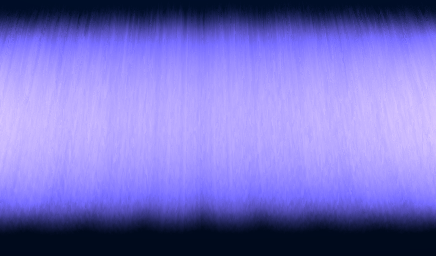
This is what the raymarching code looks like:
                fixed4 result = fixed4(0,0,0,0);
                const int max_iteration = 64;
                float t = 0;
                float stepSize = 1.0;
• result: The final color and transparency value, initialized as black (0,0,0,0).
• max_iteration: The maximum number of raymarching steps (limits performance cost).
• t: The travel distance along the ray (how far the ray has moved).
• stepSize: The initial step size for the ray, affecting how far we move in each iteration.
for (int i = 0; i < max_iteration; i++)
• A loop that steps at most 64 times.
float3 p = ro + rd * t;
• This moves the ray forward to position p based on the current travel distance t.
if(abs(d) < 2.0)
• If the distance d is small (less than 2), the ray is inside the aurora.
float baseDensity = (2.0 - abs(d)) * _Density * 0.2;
• Controls how much light is accumulated.
float heightColorFactor = saturate(p.y / _Height);
float3 auroraColor = lerp(
    _AuroraColor.rgb * bottomBoost,
    _AuroraColor.rgb * float3(0.5, 0.5, 1.0),
    heightColorFactor
);
• Interpolates between two colors based on height.
• Near the bottom: Uses _AuroraColor.rgb * bottomBoost (brighter green).
• Near the top: Shifts toward blue/purple (0.5, 0.5, 1.0).
t += max(stepSize, d * 0.7);
- Step forward in the ray.
result.a = saturate(result.a);
return result;
• Ensures alpha stays between 0-1, preventing over-brightening.
• The function returns a soft, glowing, volumetric aurora effect.
After adding the color fading to my existing code, it looked like this:  From this angle, it looks quite nice. But when you look at it from the side, it looks very bad because you see the sphere, and it isn’t just one line that goes up, like it should be in nature.
So, I changed the spheres to boxes again, and made them very tall and thin. The northern light also has some more glow at the bottom, so I added that. 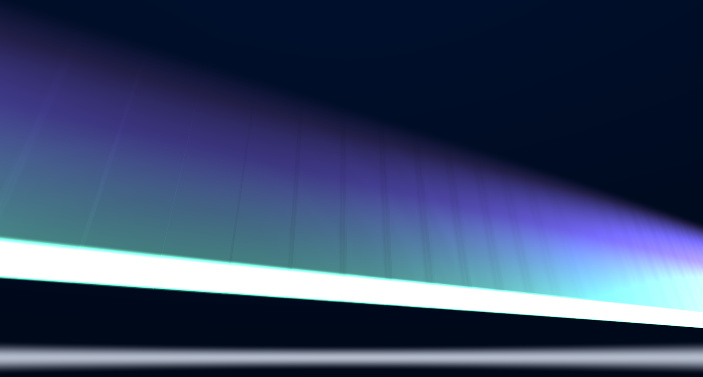 I then adjusted some variables, colors, etc to make it look better, and the best result I was able to get was this:
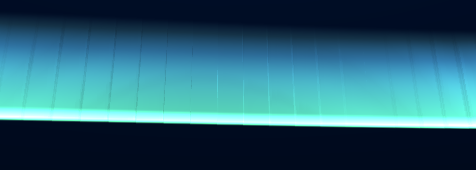
In my opinion, it looks quite alright, but there are a few things that need to be improved. And to make the possible improvements more clear, I noted them down:
• You can see the lines of every box, which is ugly and doesn’t look natural.
• The brightness at the bottom was also a bit to much.
• The height is at the same place, making it look a bit monotone.
• When looking at it from the sides, it is way to bright and shiny.
• The movement is still sinuous instead of more natural movement.
• There is only one ‘row’ in the air instead of multiple lines that merge together into one big northern light.
• Missing some for of noise or randomness.
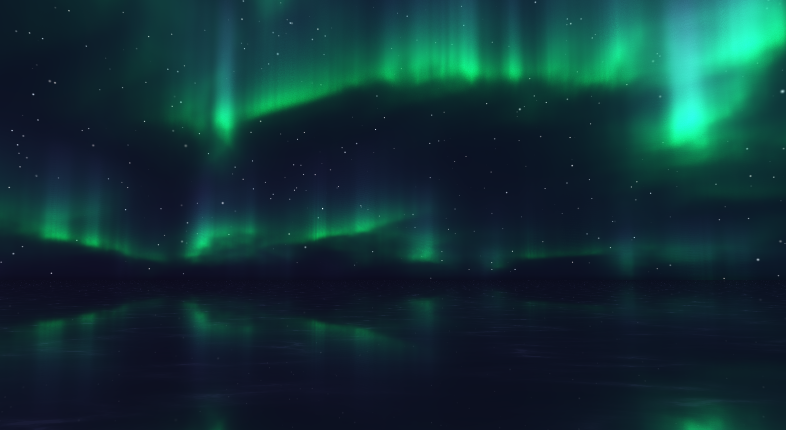
The first thing I want to fix is the edges of the boxes, because that it probably the thing that looks the worst right now. The first thing to come into my mind was making the aurora one big box instead of multiple small ones. And this approach worked better then expected. This instantly made it look better, and when changing some variables, it even looked better. 
Then I added back noise, and this made it look stunning!! 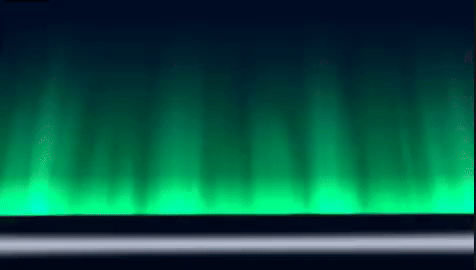
Also added an evironment: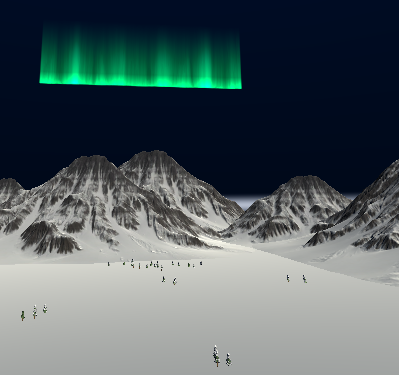
After all of this was added, I was curious about the performance. We talked about performance and hlsl earlier, so it shouldn’t have to much trouble if done correctly. When running the game, the average amount of FPS was laying around 180, with a few spikes in between. This definetly meets the requirements of ‘good’ performance. 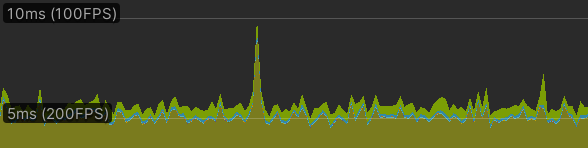
The most important thing that had to be changed by now is the movement of the aurora. At this point, it has small waves, that have the same sinuous pattern over and over again. So this needed to have a big change. My idea is to use the amplitude and frequency of the waves, and make them have different/random values. So one wave going higher with the use of the amplitude and some other waves come more frequent with the use of the frequency. 
So I added these different amplitude and frequencies, and made multitple waves, instead of just one. I also added the purple/red color to the northern light, since I think that looks cool, and also represents the multiple colors that the aurora has in real life. I added the stars from the prototype, since I didn’t have any time left to make them anymore. I adjusted some variables to my preferences, and also added a cinematic camera that moves through the scene ones you click on play. These were the final changes that I’ve done to the project. The end result of this can be seen under the results tab!
Results
After roughly five weeks of work, the project is done, and this is the result.
This is a gif of the final result: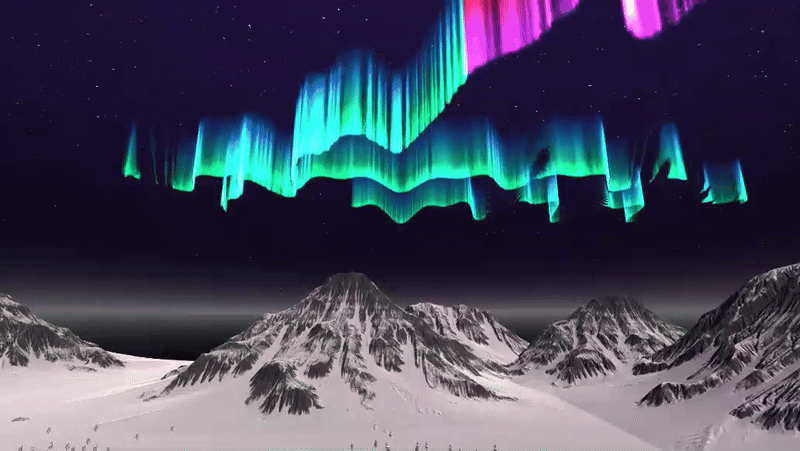
A screenshot of the final result: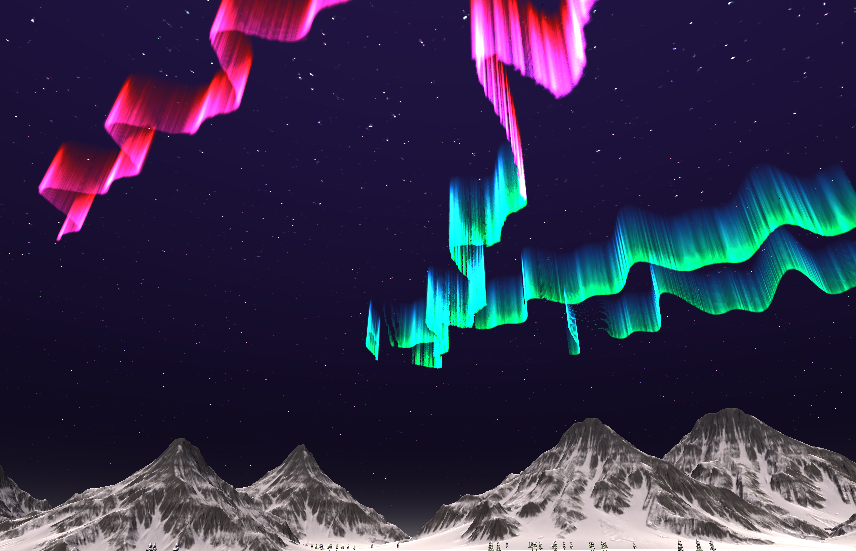
conclusion
The completed northern light shader successfully achieves all the project goals, delivering a visually stunning aurora effect while maintaining performance.
These key achievements where reached during the development of the northern light shader:
• Making the shader with hlsl.
• The use of raymarching.
• The dynamic motion of waves.
• Different colors, and gradients.
• Transparency.
• Soft edges.
• Noise in the northern light.
The project not only delivered a functional northern light shader but also provided valuable insights into: • The advantages of raymarching for atmospheric effects.
• The importance of noise algorithms in creating natural motion.
• A technique to maintain performance while making a shader.
Overall, it was a valuable learning experience, exploring the possibilities with shaders, hlsl and raymarching, and I’m excited for future improvements!
Reflection
I want to include a brief reflection. I think that I’ve learned alot this semester, and there are a lot of things that I would do different now, then before starting this semester. My main thing, is to think one step further. I this project I’ve been developing with the wrong techniques for half of the project. And the time I started with my current techniques, there were like two weeks remaining in the project. So I’m proud of my result in ’two’ weeks of developing. But I could’ve done better if I had known the techniques beforehand, or finished my research in week 1. The first weeks of coding with shaders where also difficult since I had never done it before, but I really had the feeling for it last week, which was really rewarding. I think that I made some great steps and improvements, and I’m happy with my end result after all.
Future work
There are still things that I could improve, so I listed some ideas for future development:
• Improve the perfomance further.
• Better stars and environment for an extra feel.
• Adding more advanced movement techinques.
• Adding more color variations, or letting colors shift with time.
• Adding more complex waves.
Sources
[1] “Premium HDRi environments, maps, and skies for 3D designers,” www.cgibackgrounds.com. https://www.cgibackgrounds.com/blog/what-is-a-skybox
[2] Digvijaysinh Gohil, “Simple way to make stars using shader graph in Unity #unity3d #unitytutorials #howto,” YouTube, Apr. 08, 2023. https://www.youtube.com/watch?v=WBM-JDA0vNY (accessed Apr. 07, 2025).
[3] Digvijaysinh Gohil, “Awesome skybox shader graph in Unity #unity3d #tutorial #unitytutorials,” YouTube, Apr. 01, 2023. https://www.youtube.com/watch?v=WIdVRU2tI5U (accessed Apr. 07, 2025).
[4] U. Technologies, “Unity - Manual: Using skyboxes,” docs.unity3d.com. https://docs.unity3d.com/Manual/skyboxes-using.html
[5] Freedom Coding, “HLSL Shaders VS Shader Graph - Which One To Use?,” YouTube, Oct. 04, 2023. https://www.youtube.com/watch?v=iOAMlWbc7_M (accessed Apr. 07, 2025).
[6] Jettelly, “Understanding Unity Shader Structure,” Jettelly.com, Nov. 14, 2024. https://jettelly.com/blog/understanding-unity-shader-structure? (accessed Apr. 07, 2025).
[7] Unity Technologies, “Unity - Manual: Introduction to writing shaders in code,” Unity3d.com, 2025. https://docs.unity3d.com/Manual/SL-ShadingLanguage.html (accessed Apr. 07, 2025).
[8] K. Engel, M. Hadwiger, J. Kniss, and C. Rezk-Salama, “Real-Time Volume Graphics.” Accessed: Apr. 07, 2025. [Online]. Available: https://webdocs.cs.ualberta.ca/~pierreb/Visualization2006/Real-Time-Volume-Rendering.pdf
[9] Y. R. Serpa, “Making procedural noise in Unity - LogRocket Blog,” LogRocket Blog, Nov. 07, 2022. https://blog.logrocket.com/making-procedural-noise-unity/ (accessed Apr. 07, 2025).
[10] L. Hong, “Shader Tutorial: Flow-Map - Louis Hong - Medium,” Medium, Oct. 04, 2019. https://louisgamedev.medium.com/shader-tutorial-flow-map-4410af832a8d (accessed Apr. 07, 2025).
[11] “Shadertoy,” Shadertoy.com, 2015. https://www.shadertoy.com/view/XtGGRt (accessed Apr. 07, 2025).
[12] “Ray Marching,” Michael Walczyk. https://michaelwalczyk.com/blog-ray-marching.html
[13] Sum and Product, “Signed Distance Functions & Ray-Marching,” YouTube, Aug. 04, 2023. https://www.youtube.com/watch?v=hX3mazz8txo (accessed Apr. 07, 2025).
[14] Peer Play, “Raymarching Shader - Unity CG/C# Tutorial _Chapter[2] = ‘Camera Setup’; //PeerPlay,” YouTube, Nov. 30, 2018. https://www.youtube.com/watch?v=82iBWIycU0o (accessed Apr. 07, 2025).
[15] Sebastian Lague, “Coding Adventure: Clouds,” YouTube, Oct. 07, 2019. https://www.youtube.com/watch?v=4QOcCGI6xOU (accessed Aug. 05, 2024).
[16] S. Waldek and D. Dobrijevic, “Aurora Borealis: What Causes the Northern Lights & Where to See Them,” Space.com, Oct. 11, 2017. https://www.space.com/15139-northern-lights-auroras-earth-facts-sdcmp.html
[17] “Where to see the Northern Lights 2020/2021,” www.best-served.co.uk. https://www.best-served.co.uk/blog/where-to-see-the-northern-lights-2015-2016
[18] OpenAI. (2025). ChatGPT. Retrieved from https://chat.openai.com/. ChatGPT was used for spelling and grammar checking. The tool was solely used for textual improvements without altering the original meaning.