Table of Contents
- 1. Abstract
- 2. Introduction
- 3. Research Question
- 4 Theoretical Framework
- 5 Setting Up
- 6 Basic Clothing
- 7 Cloth Simulation
- 8 Mesh Alteration
- 9 Implementing Weaponry
- 10 Conclusion
- 11 References
1. Abstract
For this project I hope to explore the development of a cosmetic equipment system for a game, focusing on the visual adaptation of clothing and weaponry to different player models. I hope to outline solutions to key challenges such as ensuring proper animation, preventing clipping, and enabling seamless equip/unequip functionality.Through my research and experimentation I hope to highlight methods for creating an intuitive user experience, allowing for diverse character customization.
2. Introduction
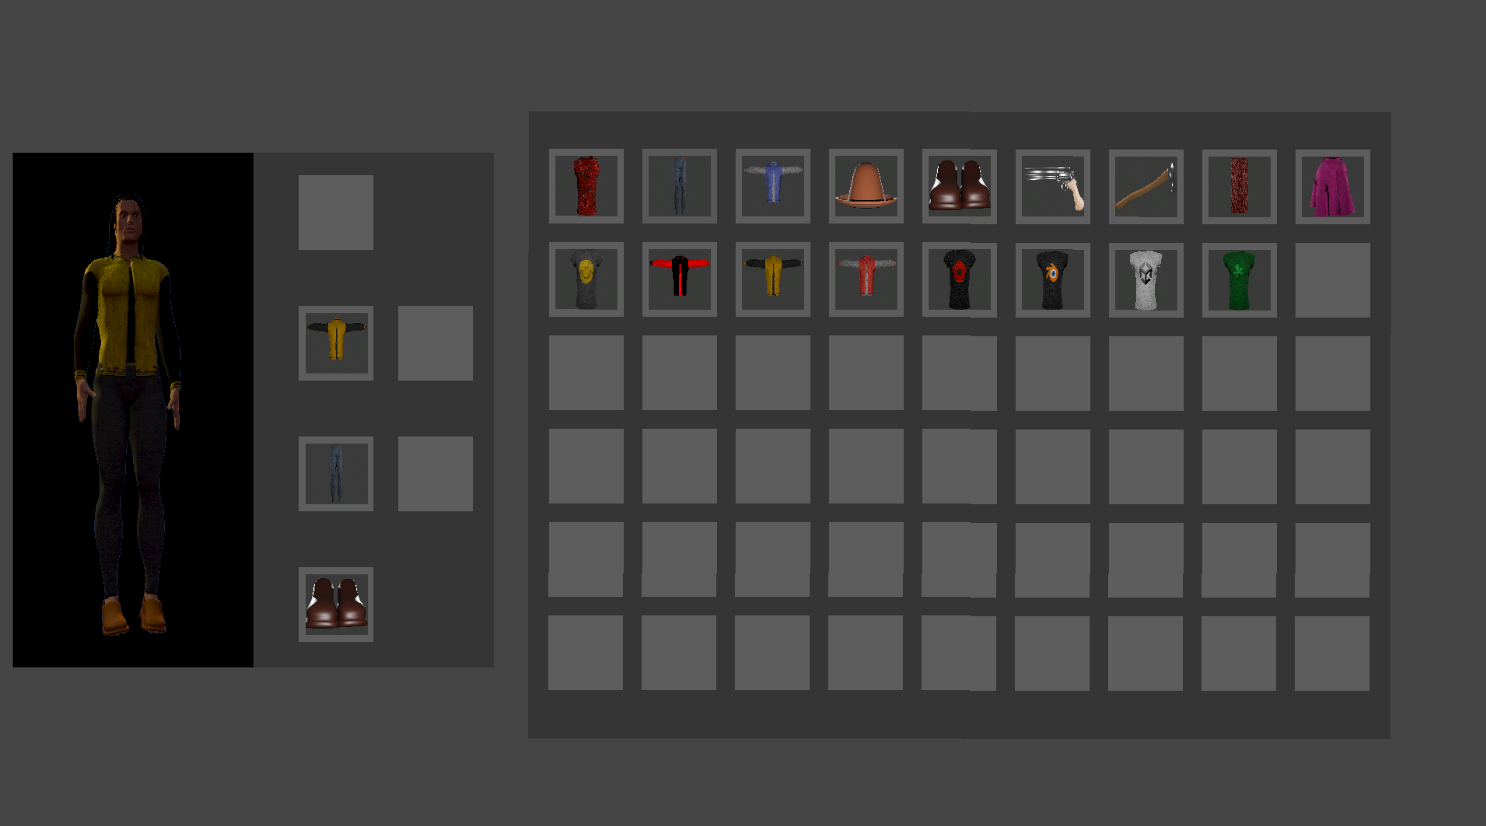
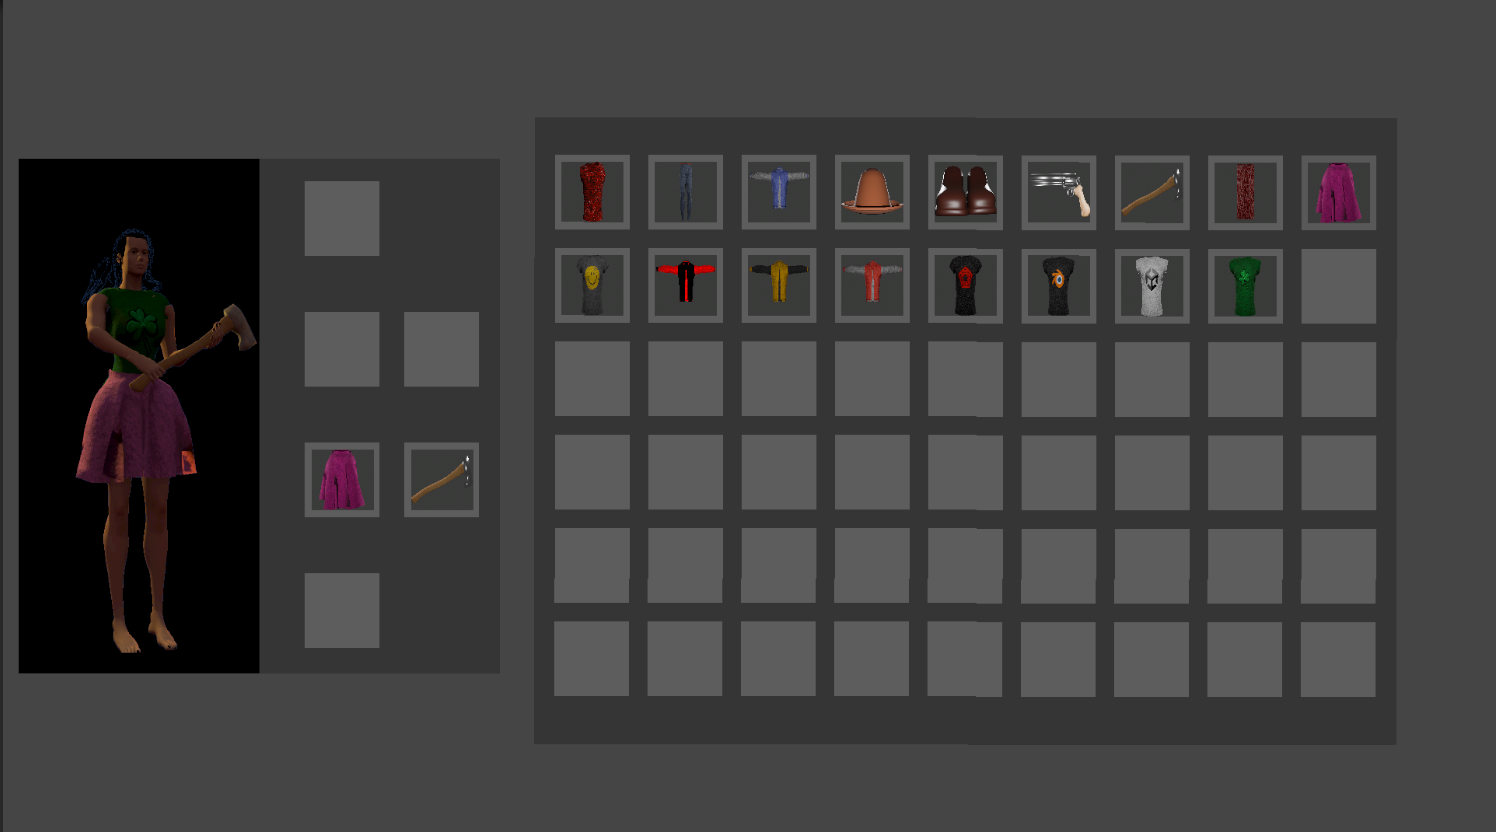
My goal for this project is to have an equipment system that visually affects the player character. The player should be able to equip clothing and weaponry from a simple UI system. Once equipped the items should visually change the player model. For items/weapons they will need to appear in the players hands and for armouor or clothing, they should appear on the player model in the correct place and should move and animate with the players model.
3. Research Question
How would I create a system for visualising a players equipment so that it fits two or more player models while animating and moving with the player?
3.1 Sub Questions
How would I get clothing Items to animate with the player?
How would I get clothing Items to fit multiple different models?
How would I implement different types of equipment(clothes, weaponry)?
4 Theoretical Framework
4.1 Required Systems
To create an interactive and visually dynamic inventory system, the following systems are required:
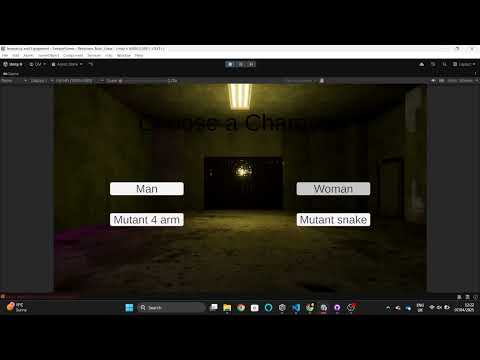
UI System: Allows players to choose and preview their equipment in a simple and intuitive way.
Equip System: Ensures selected equipment is correctly assigned to character slots while dynamically hiding areas covered by the equipment.
Unequip System: Allows players to remove or swap equipment seamlessly, ensuring that previously hidden body parts are restored when necessary.
Animation System: Ensures that clothing and weapons animate correctly with the character model, adjusting for different stances (e.g., one-handed vs. two-handed weapons).
Mesh Deformation System: Adjusts clothing meshes to fit various character models, preventing clipping and ensuring a natural look.
All these systems must work together to provide a seamless and immersive visualization of equipment for the player.
4.2 Optimizations
Since the equipment system is purely cosmetic, optimizations should focus on performance efficiency:
Hidden Mesh Optimization: Unseen parts of the character (such as body areas covered by armor) should be culled to reduce rendering load.
Shared Animations and Rigs: Whenever possible, animations should be reused across multiple equipment sets to minimize memory usage and improve consistency.
Dynamic Mesh Adjustments: Clothing and armor should adapt dynamically to prevent clipping and maintain visual fidelity.
4.3 Human Factors and User Experience (UX)
A successful cosmetic equipment system should prioritize:
Ease of Use: Players should be able to quickly equip, swap, or remove items with minimal effort.
Intuitive UI and Feedback: The system should provide clear visual indicators for equipped items, available slots, and hidden body parts.
Real-Time Previews: Players should see how items look on their character before finalizing selections, preventing frustration.
Customization and Expression: The system should support diverse player expression through mix-and-match options while ensuring a polished visualization.
4.4 Conceptual Framework
Inputs: Player selections, character model variations, equipment meshes, and animations.
Processes: Equipment assignment and mesh adaptation, UI interactions for equipping/unequipping, animation syncing, and rendering optimizations.
Outputs:
- Visually seamless and immersive character customization.
- Efficiently rendered equipment with no character clippings.
Conclusion
By utilising these methods, the equipment system ensures a smooth, visually appealing, and user-friendly experience. The focus is on customization and an understandable UI, allowing players to fully express themselves.
Research and Process
5 Setting up
I started out with this project by creating two separate player models, a male and female model, that I intend to allow the player to choose between. I intend to be able to use the same models for equipment for all players, adjusting them where necessary. I created these models in blender using the MBLabs extension to get a good human base model. I then divided the bodies of the models into head, torso, arms, torso, legs and feet so that I can easily hide parts of the model if necessary to prevent the base model clipping through the clothing
6. Basic clothing
From here, I began researching how games implement armor and clothing systems, as my first goal is to ensure that equipment properly attaches to and moves with player models. Fortunately, this is a well-documented topic, with various approaches used in game development depending on the engine, animation system, and project requirements.
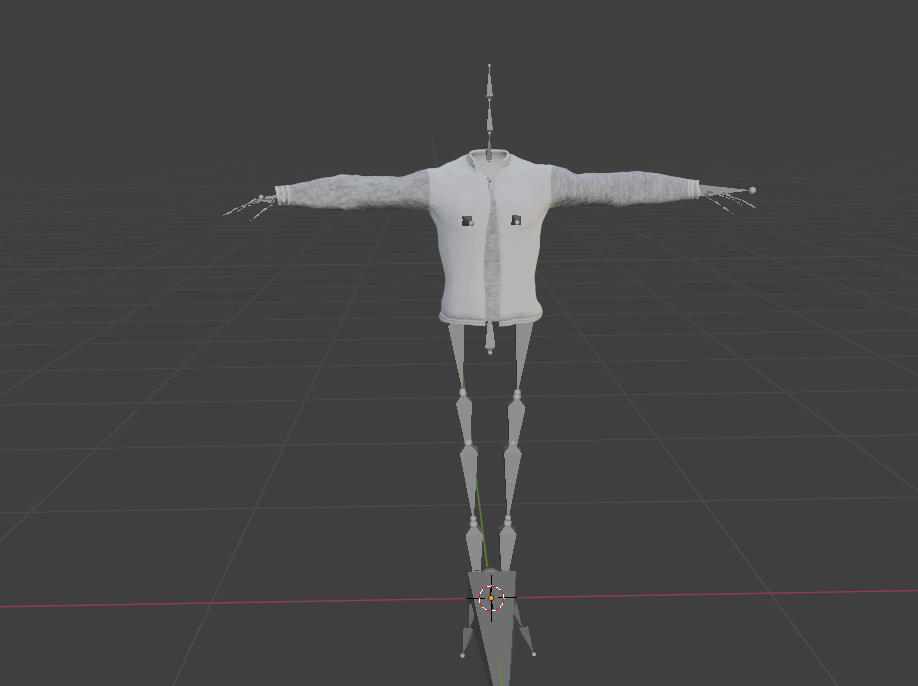
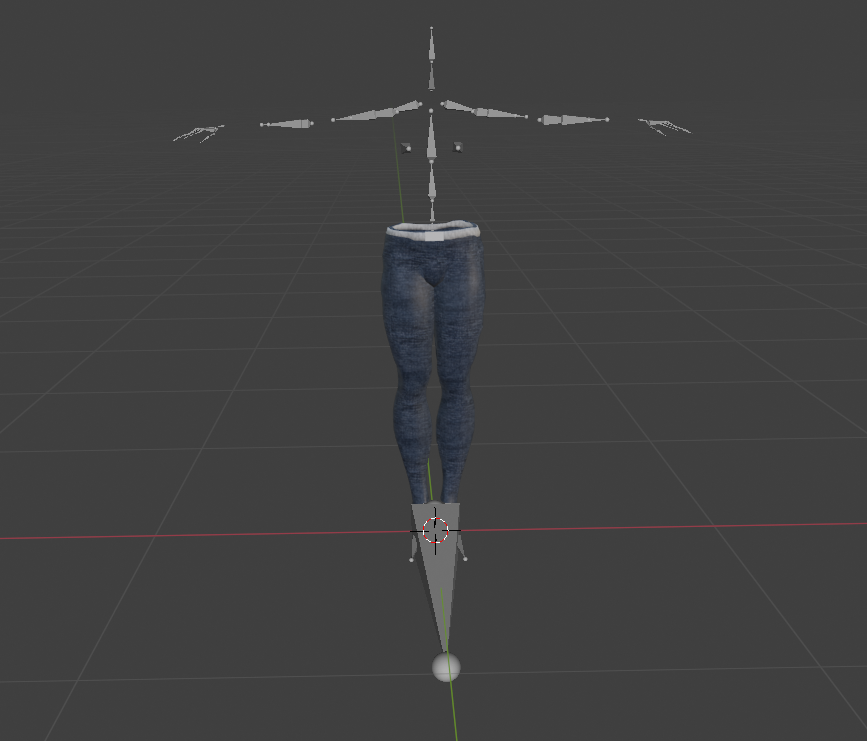
The solution I have chosen involves creating clothing on a base model, then rigging it to the character model’s armature. After that, I will export each clothing item from Blender using that armature. This approach ensures that all player models and clothing items share the same rig, allowing them to animate correctly without issues like misalignment or clipping. By keeping a consistent armature across all assets, I can streamline animation and avoid unnecessary complications when switching outfits in-game. This does however mean I’ll have to recreate the models I’ve already made as currently they all have different armatures.
While exploring different methods, I came across a helpful tutorial here[1]. Although I won’t be following this method exactly, it provides a strong foundation for understanding the process. Beyond this tutorial, I found additional resources that discuss necessary techniques for this project[2] [3]
7 Cloth simulation
Moving forward I wanted to look into making clothing that uses cloth simulation, I could use this for clothing that doesn’t attach completely to the base mesh and can dangle or flow off of it instead, such as capes scarves, skirts and many more clothing Items. I found multiple ways of doing this.
The first method would be to weight paint the top of the mesh to the spine bones and then run a cloth simulation in blender. I would then need to bake that simulation as an animation[4] as cloth sims can’t be directly exported to Unity. I’d then have to give the cape its own unique animation controller in unity. This would be better for performance than constantly running the cloth sim in unity but it wouldn’t dynamically react to the players movement, which is what I’d like to have it do.
The second method would be to use Unity’s built in cloth simulation system[5]. I could export the cloth and the armature together, as I’ve done previously for the basic clothing, the cape would be weight painted to either the neck or the shoulder bones. Once imported into unity I would then apply the built in cloth script, I would then have to paint the cloth constraints onto the cape mesh as close to the bones as possible. after that I would have to create capsule colliders for the arms, legs and back specifically for the cloth sim being run as unity’s cloth sim only has support for capsule and sphere colliders. This would ensure that the cape interacts dynamically with the players model as it animates. I threw together a small test to see if this method would work for me.
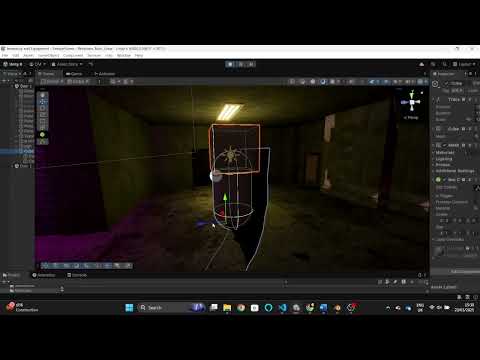
from there I started applying it to the characters. The final result looked like this:
8 Mesh Alteration
Each clothing mesh wil need to be altered to better fit the player models body type. I have found a number of ways in which this can be done:
8.1 Bone Scaling
The bones of a character rigs armature can be scaled to deform the all the vertices that are weight painted to that individual bone. I could use this to make adjustments to areas such as hips, chest, arm/legs width/length. I could make it so each item checks which character type the player has chosen and could then scale each bone accordingly. There are some issues with this method however as bones can only be scaled so far before the clothing starts to look unnatural and also it can lead to textures looking squashed or stretched as even when scaled the mesh will still have the same uv map. It can also lead to issues with animation as the bones are also directly responsible for animation.
8.2 Blend Shapes/Morph targets
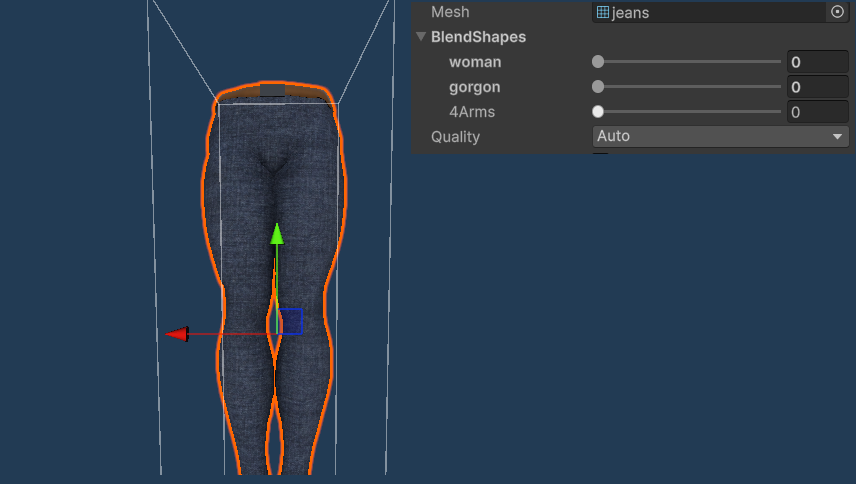
Blend shapes (sometimes referred to as morph targets or shape keys) can be created in blender and imported into unity. A blend shape allows you smoothly transition a mesh between different shapes without changing its base rig or topology[6]. This is done by creating a base mesh, then creating the shape keys you want and adjusting that shape key accordingly. Once exported to unity the shape keys can be found under the Blend shapes dropdown in the skinned mesh renderer component. These blend shapes have a weight value can then be controlled using a slider between 1 and 100.
Below is an example of the differences between bone scaling and shape keys:

From this image you can see that shape keys would better suit my purposes for this project. Bone scaling can be useful for small adjustments but need to be fine tuned a lot as each bone needs to be scaled individually and will scale any bone connected to it, those bones would then require further adjustment afterwards. It would be a lot more effort for a much worse result as scaling bones does not allow for directly deforming of the mesh’s topology. Shape keys do not have this problem as they do allow for direct deformation of the topology, leading to a much cleaner result.
There are two ways that I can progress with this method:
I could create shape keys to control minimum and maximum vertex positions for the hips, chest, arms, legs etc. and adjust the weight sliders on that accordingly to deform the mesh for the chosen player Type. The values for these weights could be stored either in the equip script or in the player script itself. Once instantiated the weights can then be applied. This would be less accurate than my next method but would be vastly more adjustable. This method would be more useful for if I had some form of character customisation[7] simillarly to something like the sims games, I found some useful information on that kind of system in the GDC Vault[11].
I could create a shape key specifically for each character type and set the weight for that key to 100, and all other weights to 0. This would allow me to fit the base meshes exactly and the base meshes are not adjustable by the player so there is no real reason (for my purposes) that the weights would need to be at any value other than 0 or 100[8].
8.3 Adapting for Non-Humanoid mehses
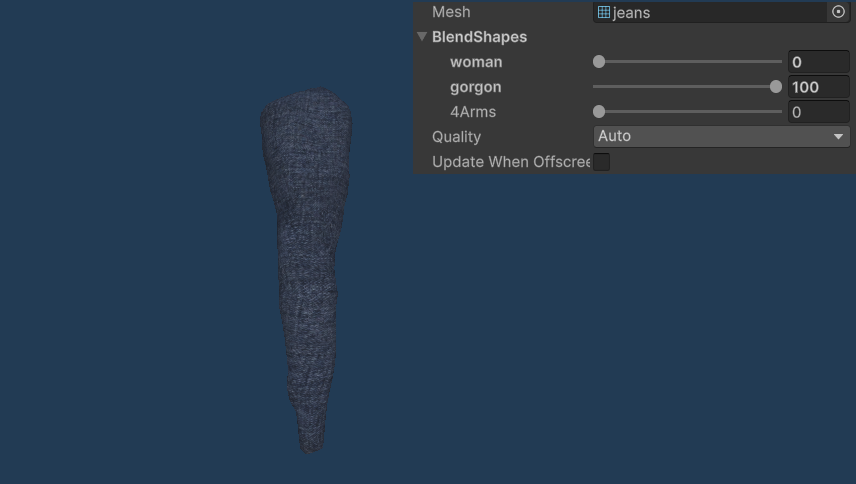
For my project I have two non-humaoid meshes in my project a snake woman and a 4 armed man. Adjusting for these characters was a bit more difficult but could still be done quite easily. The shape keys for these meshes needed a lot more alteration, for instance the trousers for the snake woman required a lot of alteration as she does not have legs. She does however still share the same rig, which makes things somewhat simpler as they can still share the same animations as the base model, which means the clothing could use any new animations created specifically for the snake woman. The shape key method can still be used but the modifications have to be a lot more drastic to account for the different body types.
These two images below show the same mesh using seperate shape keys.
9 Implementing weaponry
As the system I am designing is purely cosmetic the weaponry will not need to be functional. The player model will just need to react accordingly to the type of weaponry they have equipped.
To do this, I’ll need to use two key tools:
Avatar Masks – These let you decide which parts of the character follow a specific animation[9].
![]()
Animation Override Controller – This allows you to swap out animations dynamically while keeping everything smooth[10].
By combining these, I can mix different animations together. For example, if a player equips a one-handed weapon, I can make only the right arm play the “holding weapon” animation while the rest of the body still moves normally (like walking). I’d set the weight of the mask to around 0.8, meaning the arm prioritizes the weapon animation but still blends naturally with the rest of the movements.
I will set up two masks: one for one-handed weapons and another for two-handed weapons. These masks will be applied not only to the player model but also to any equipped gear. Because of this, the system will need to run a check whenever the player equips or unequips any item. Additionally, I will create unique animations for each weapon state. The masks will only activate when the player equips a weapon, ensuring smooth and appropriate animations.
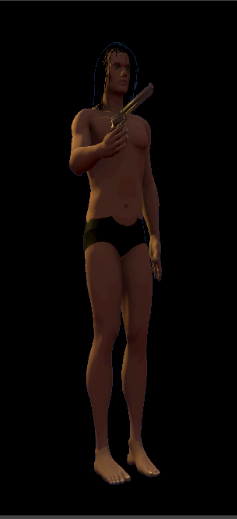
One handed weaponry: 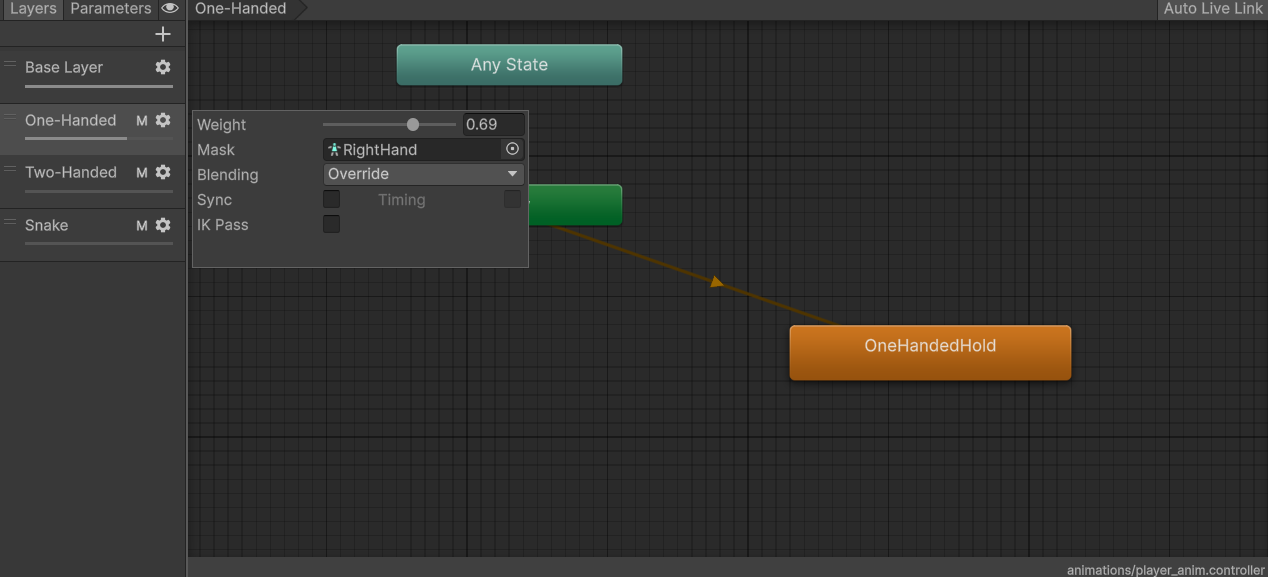
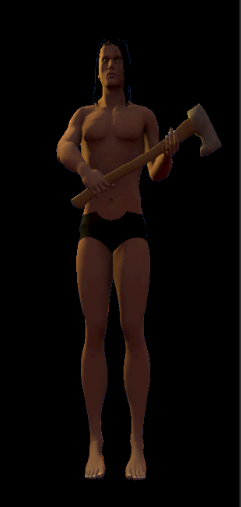
Two handed weaponry: 
10 Conclusion
This project aimed to explore and develop a cosmetic equipment system capable of visually adapting clothing and weaponry to multiple player models. Through researching existing methods and conducting practical tests, I have created a basic workflow for character equipment that supports rigged clothing, dynamic mesh fitting, and animation blending.
10.1 Key Findings:
Shared Armature: Using a consistent rig across all character models and clothing assets ensures reliable animation and dramatically reduces compatibility issues. It’s the most scalable and stable solution going forward.
Cloth Simulation: Unity’s built-in cloth system shows promise for dynamic garments like capes and skirts. While real-time cloth provides interactive movement, it needs careful optimization through collider placement and constraint painting to avoid physics issues. Pre-baked cloth animations are a more preformance friendly alternative but sacrifice interactivity.
Mesh Alteration: Both bone scaling and blend shapes have pros and cons. Blend shapes provide more visual fidelity, especially when switching between character body types, and will likely become my primary method for mesh fitting. Bone scaling, while simpler, leads to stretching artifacts and animation complications.
Weapon Animation Handling: Avatar Masks combined with Animation Override Controllers offer a modular solution for switching between weapon stances. The system allows partial-body animations to blend cleanly with full-body movement, providing visual consistency when weapons are equipped or removed.
10.2 Next Steps:
Expand the equipable items with additional clothing and weapons.
Improve visuals of UI system to be easier on the eye of the player.
Add system for character changing mid game to allow character swapping without reloading the scene.
Add systems for swapping bone weights of models between rigs, preventing use of multiple armatures.
Allow parts of clothing models to be hidden the same way the player body is to prevent clipping between clothing items.
By following these steps, I believe the system can scale to support deep player customization while remaining performant and visually polished.
11 References
[1] Dev students, “How to Equip Clothing and Weapons in Unity 3D #1: Attaching Items to the Rig”, YouTube, 20 Apr 2017 [Online] Available: https://www.youtube.com/watch?v=hcJ5luBs_jw
[2] Blender Foundation, “Rigging and skinning,” Blender Manual, Mar 2025. [Online]. Available: https://docs.blender.org/manual/en/latest/animation/rigging/
[3] Unity Technologies, “Animation section,” Unity Manual, Mar. 2025. [Online]. Available: https://docs.unity3d.com/Manual/AnimationSection.html
[4]Eternals Studio, “Parachute Animation + Exporting Cloth to Unity”, YouTube, 30 Apr 2022 [online] Available: https://www.youtube.com/watch?v=gP4kfO9KjdA, timestamp: 7:24
[5]LMHPOLY, “GAME ASSET TUTORIAL - How to Create a Cloth in Unity 5 (PART 2/2)”, YouTube, 5 May 2017 [online] Available: https://www.youtube.com/watch?v=UK8s7sowxiI
[6]Unity Technologies, “Work with blend shapes,” Unity Manual, Unity 6, Mar. 27, 2025. [Online]. Available: https://docs.unity3d.com/Manual/BlendShapes.html
[7]Unity Forum, “Is there compatibility or anything like skin morph targets in Unity?”, Unity Forum, [Online]. Available: https://discussions.unity.com/t/is-there-compatibility-or-anything-like-skin-morph-targets-in-unity/187413/2.
[8]Unreality3D, “Blender Shape Key Setup for Unity Blend Shapes - Demonstration”, YouTube, 16 Jul, 2020. [Online] Available: https://www.youtube.com/watch?v=rYD6YUV3lSk
[9]Unity Technologies, “Avatar Mask,” Unity Manual, Version 5.5, Mar. 29, 2017. [Online]. Available: https://docs.unity3d.com/550/Documentation/Manual/class-AvatarMask.html.
[10] Unity Technologies, “Animator Override Controller,” Unity Manual, Version 6, Apr. 3, 2025. [Online]. Available: https://docs.unity3d.com/Manual/AnimatorOverrideController.html.
[11] S. Nair, “Innovations in The Sims 4 Character Creator,” presented at Game Developers Conference (GDC), San Francisco, CA, USA, Mar. 2015. [Online]. Available: https://gdcvault.com/play/1022086/Innovations-in-The-Sims-4